Fertiliser sheds are the recommended option for on-farm fertiliser storage. They improve safety, save time and money, and provide flexible storage. The best way to capitalise on the storage flexibility is to use a versatile fertiliser shed design.
A versatile fertiliser shed will provide good value for money and maximise your ROI by allowing you to respond to changing storage requirements and capitalise on market opportunities.
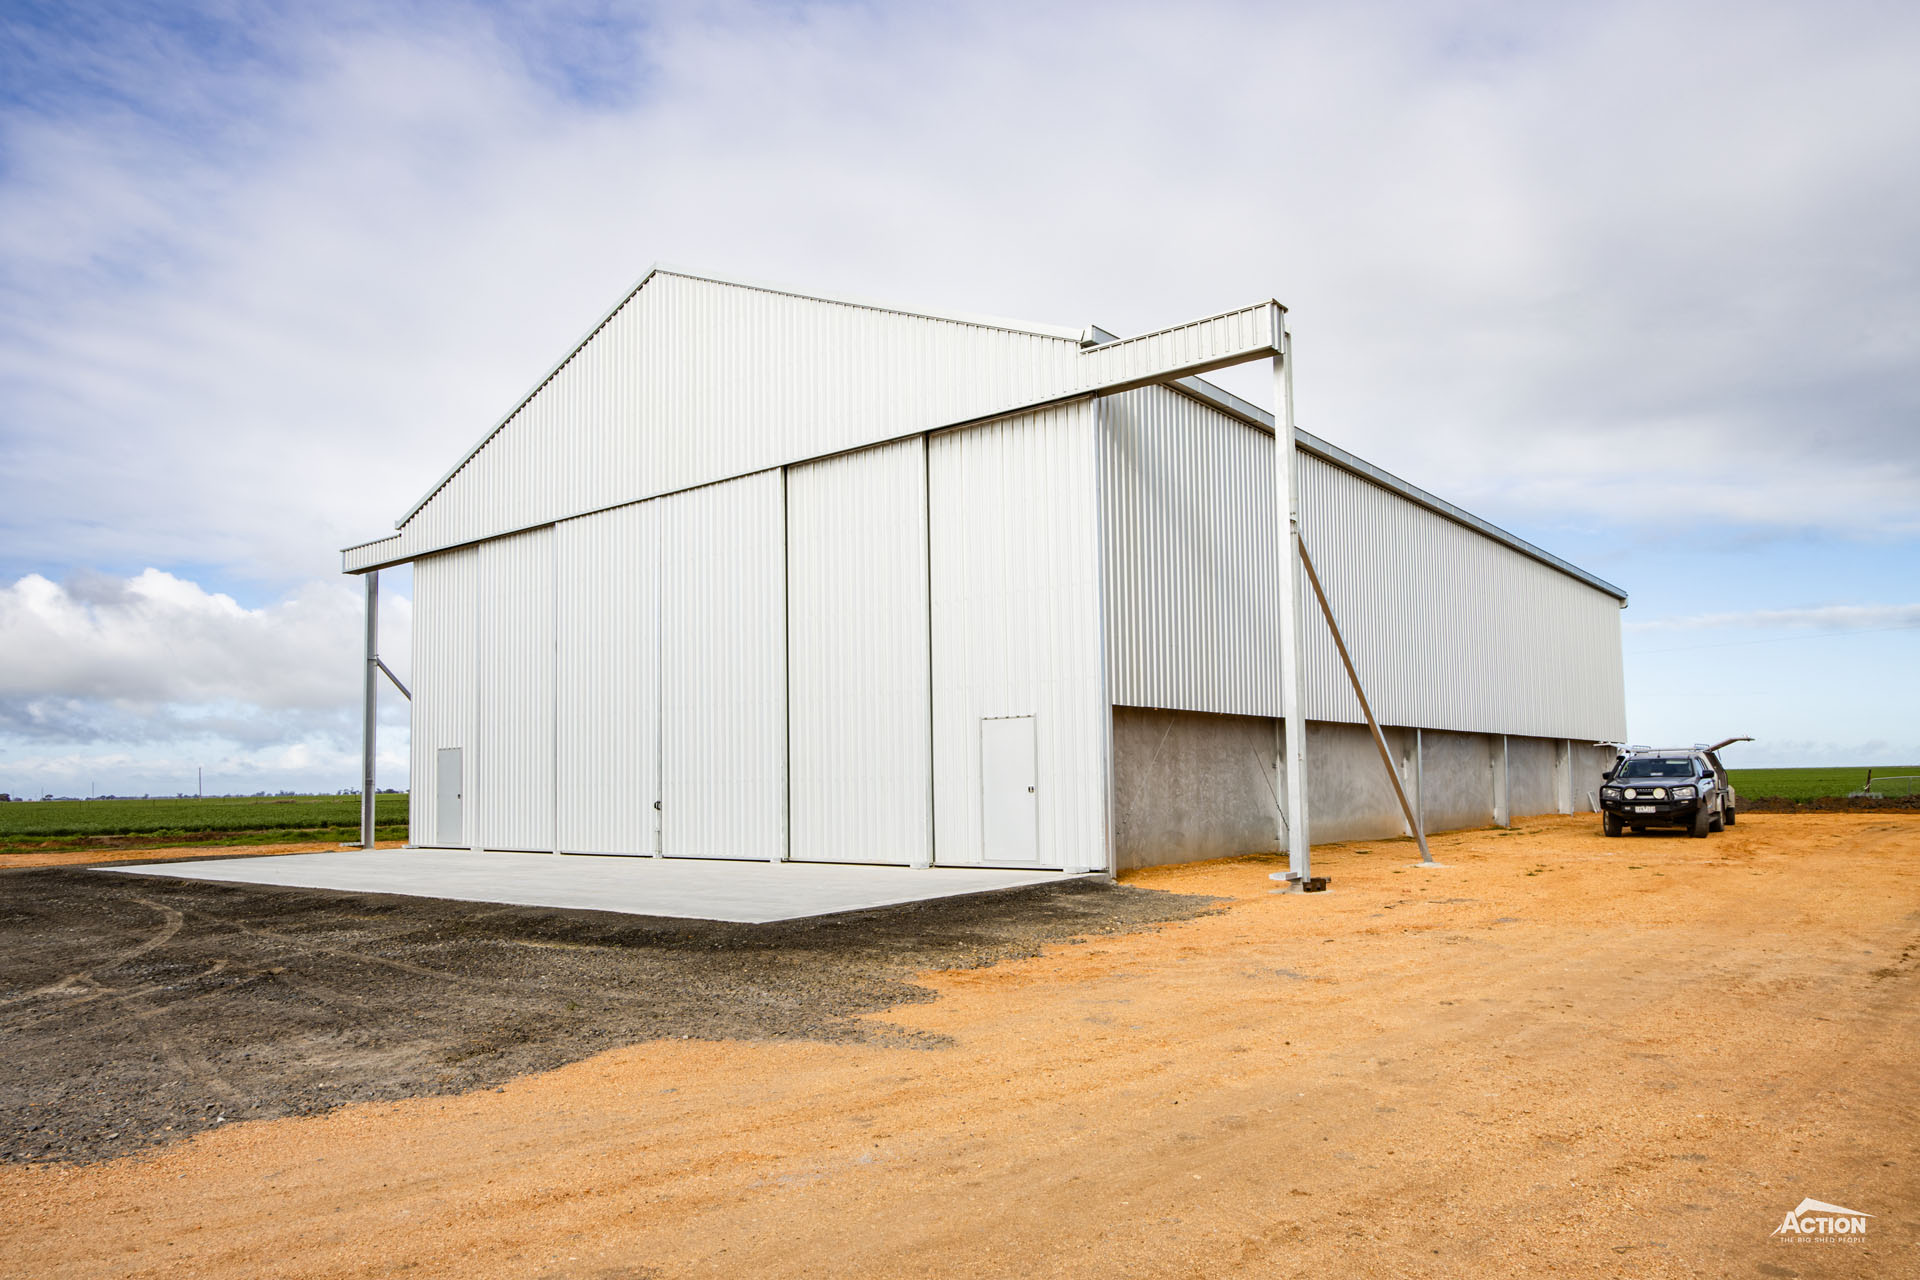
Darcra Farming’s 6000 tonne storage shed – which you can learn about here – is an example par excellence.
But your fertiliser storage shed doesn’t have to be at this scale to be versatile and provide good value for money.
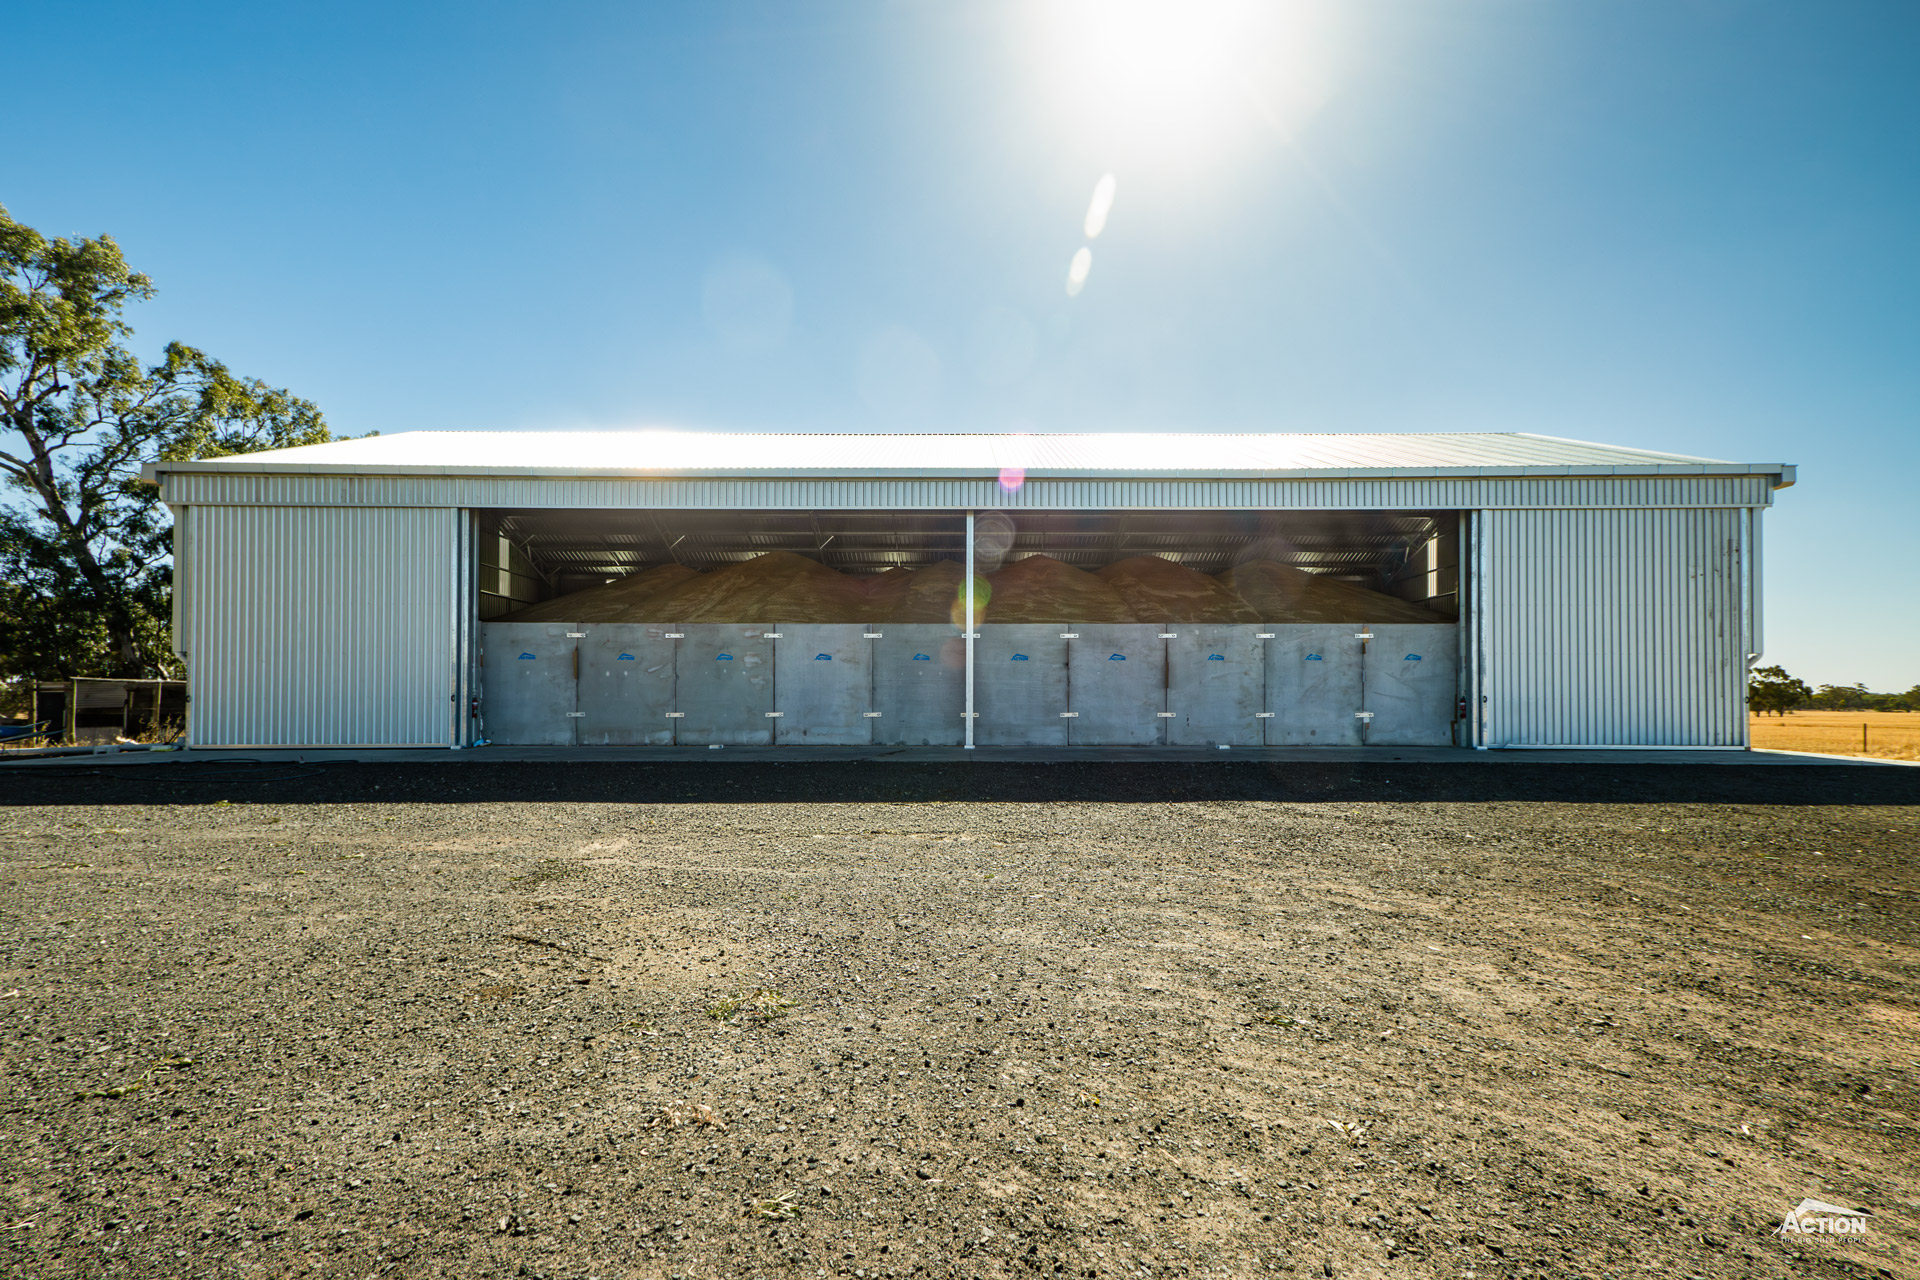
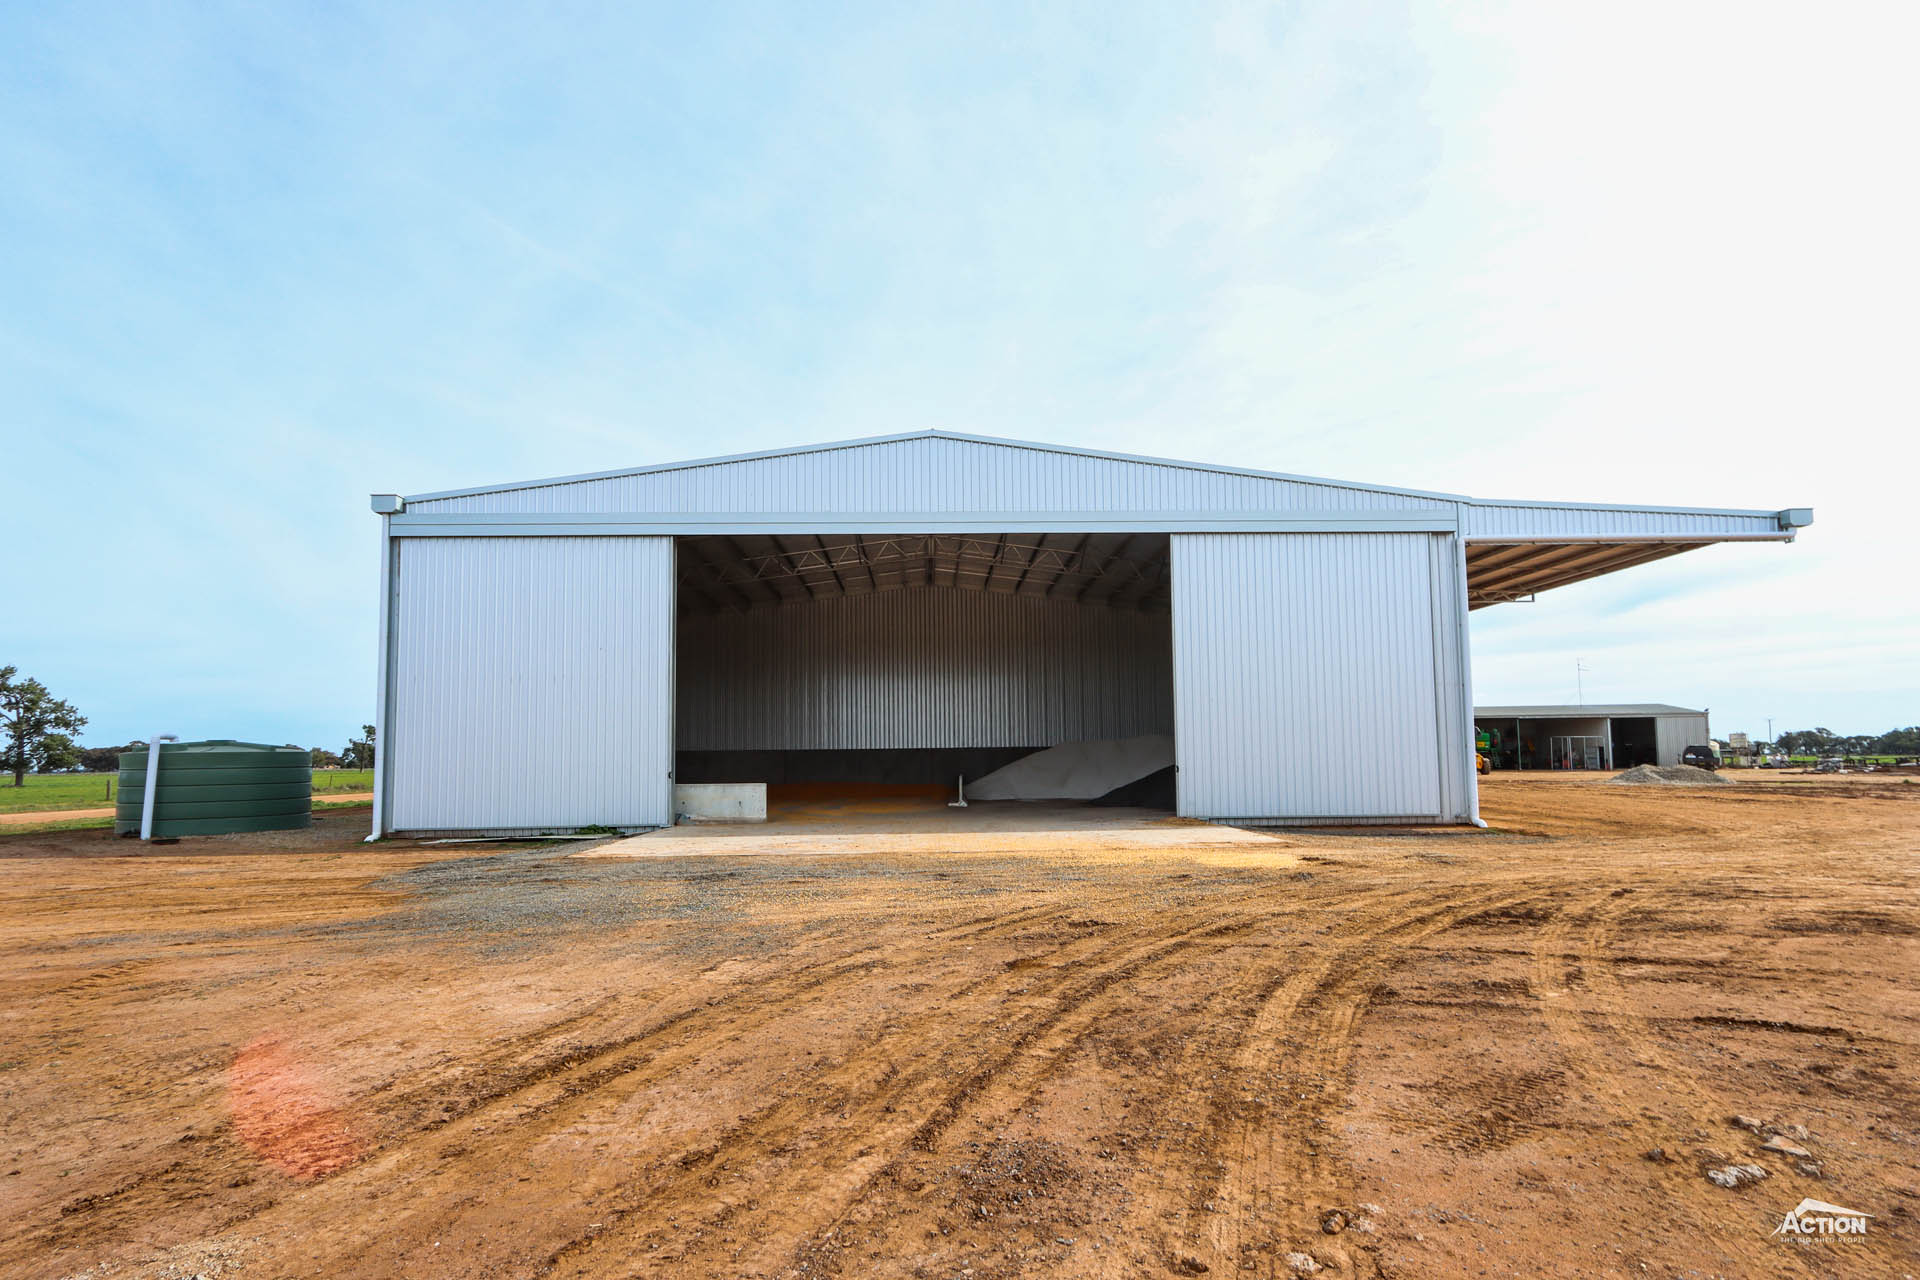
For example, John Bennett has proven the benefits of 600-tonne storage bays in his open-front shed. The bays have provided short-term grain storage at harvest to allow the headers to keep harvesting – and the shed can be used to store fertiliser, hay or machinery throughout the year.
As you can see, there are several ways you can achieve a versatile storage set-up.
So, how do you design a versatile fertiliser shed?
Before you start the design process, it is a good idea to have a clear picture of your requirements, such as:
- What products are you storing, and how much?
- Is segregation a requirement?
- How do you intend to load and unload the shed?
- What is your budget?
- How will you use the shed throughout the year?
- Do you need to expand your machinery storage?

6 Ways To Create A Versatile Fertiliser Shed Design
Here’s an overview of tried-and-tested ways to improve the versatility and get the best value for money when building a fertiliser shed.
1
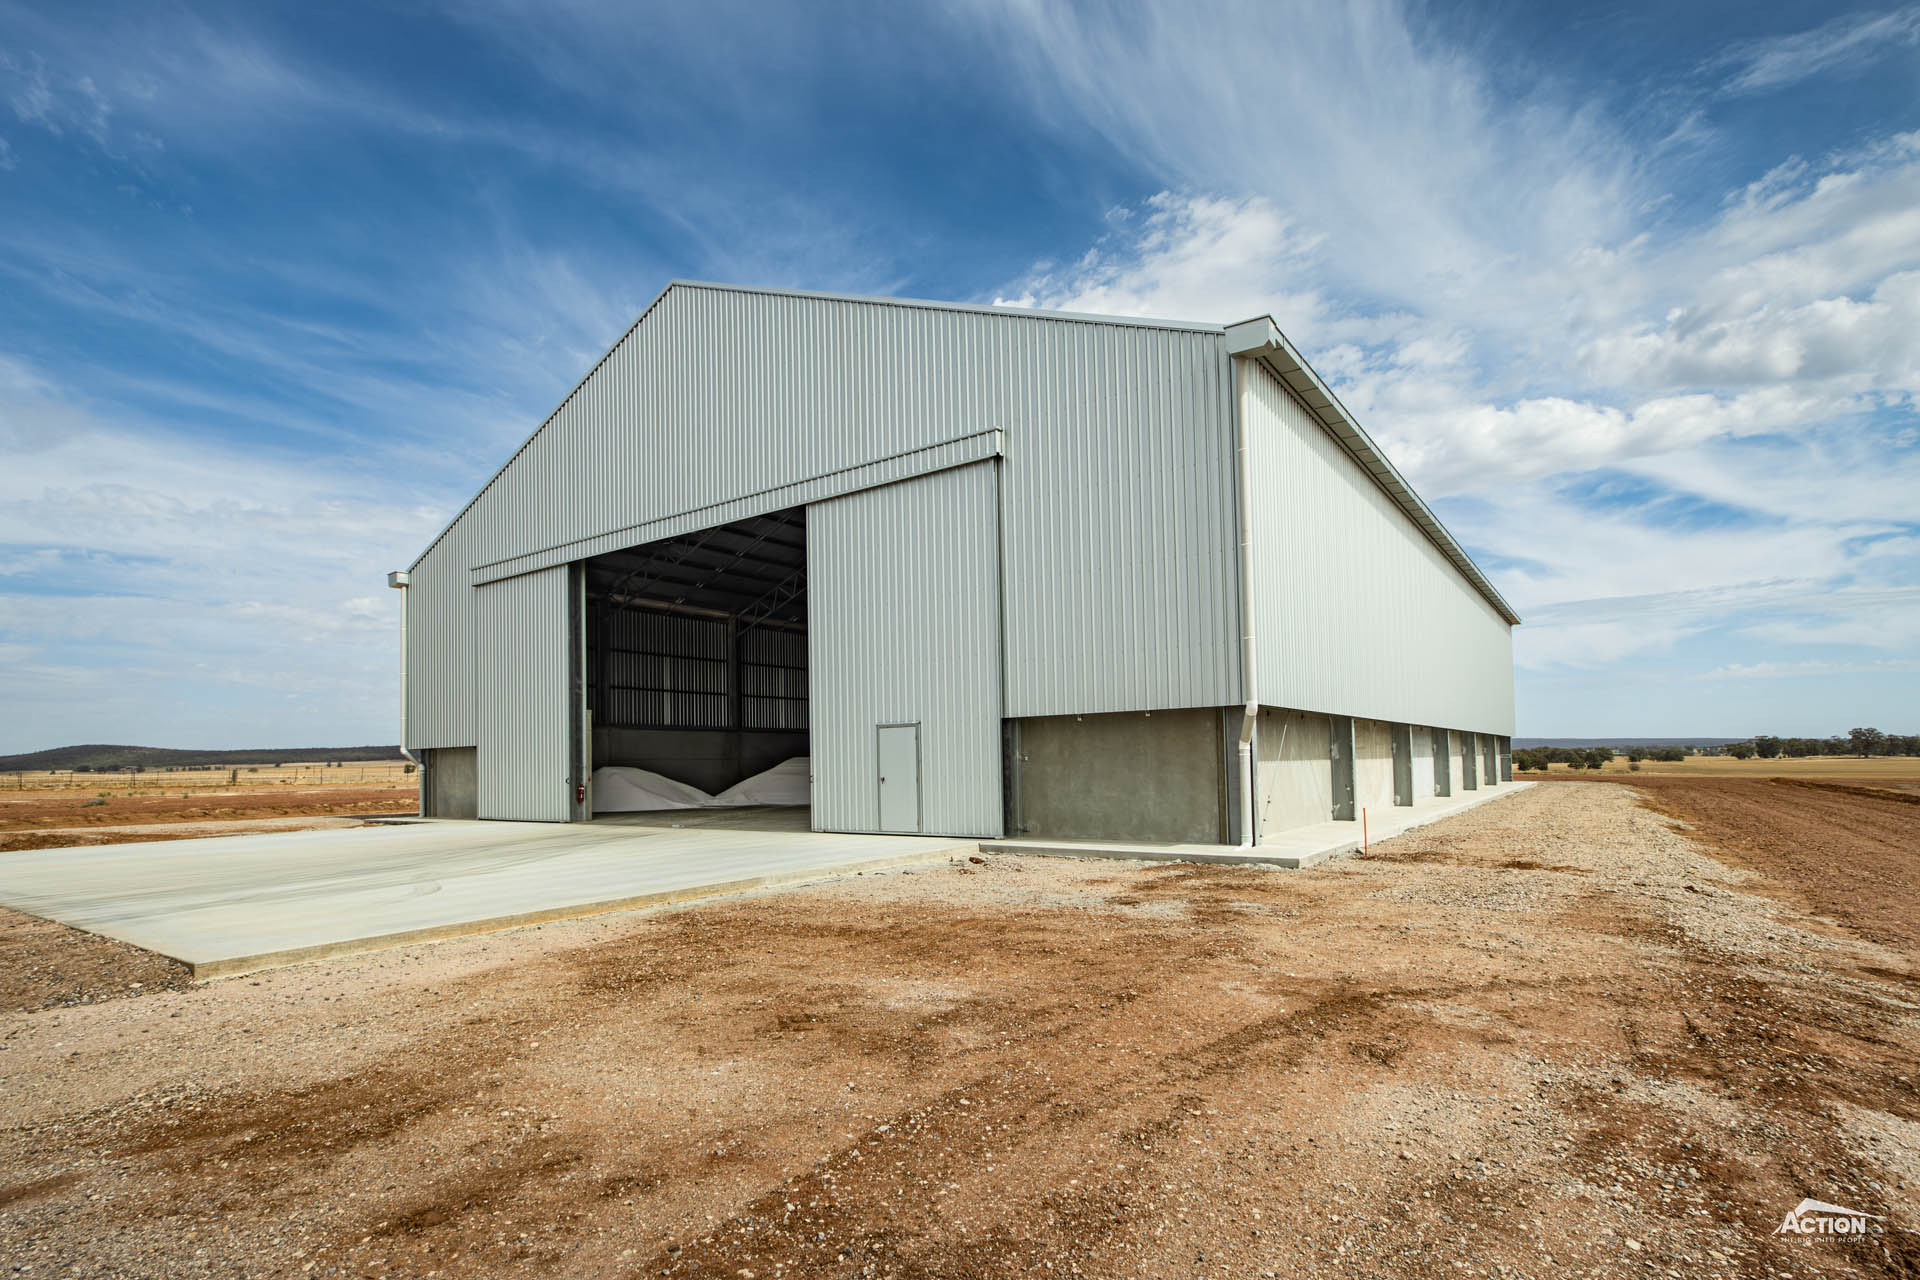
1. Start With A Bulk Storage Area
First up is a simple one.
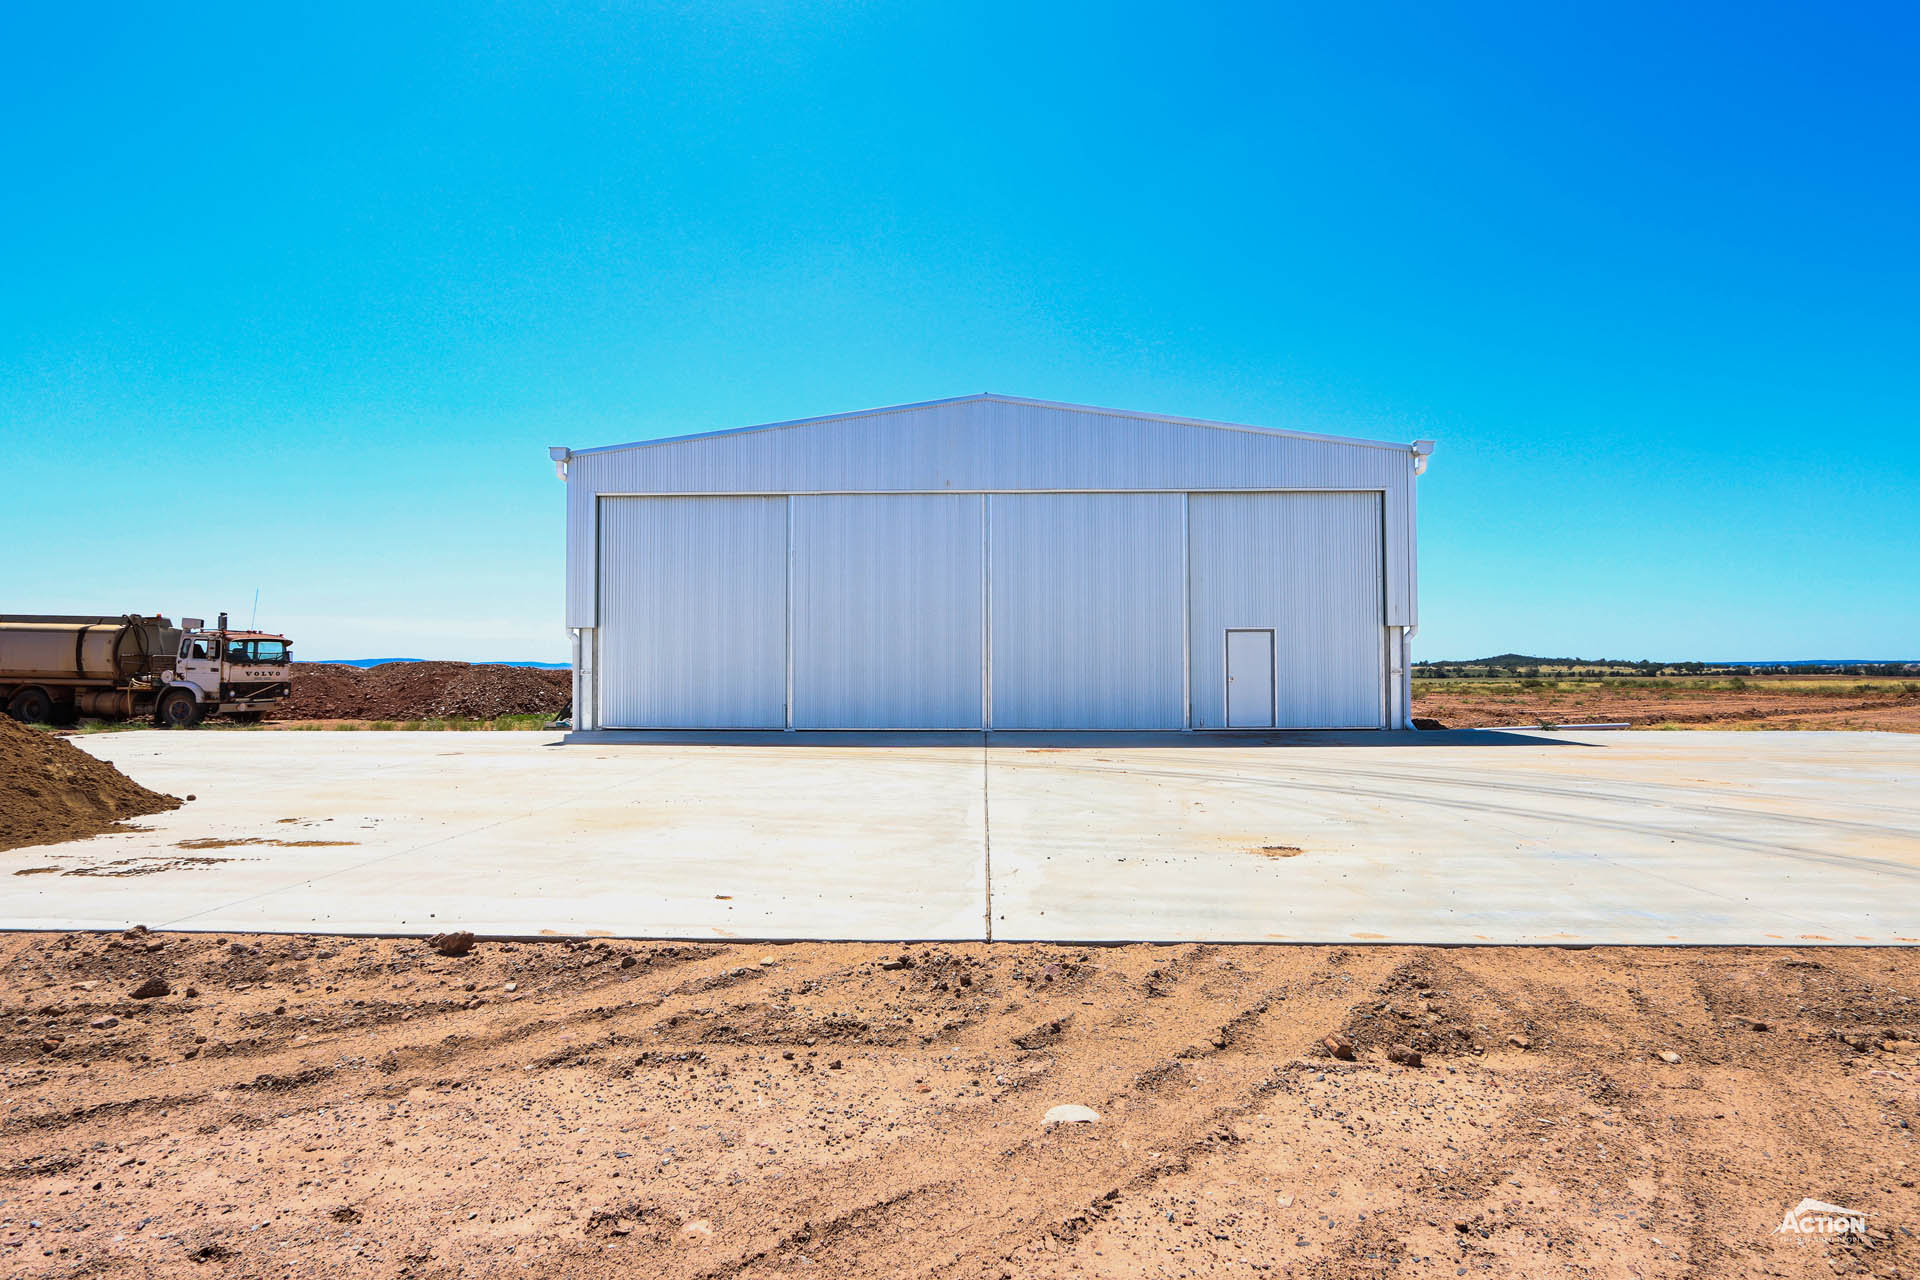
Start with a fully enclosed shed with a bulk storage area.
This is a great way to make sure your fertiliser shed can also be used for storing grain or machinery.

It also has the benefit of having a low cost per tonne, particularly if you choose the right configuration.
For example, the larger the storage area, the more cost-effective it will be.
Similarly, a narrower and longer configuration will be more cost-effective than a wider and shorter configuration.
Once you have your bulk storage area in place, this area can be segregated to contribute to a versatile fertiliser shed design.
This leads to our next point. Be smart with segregation.
2
2. Be Smart With Segregation
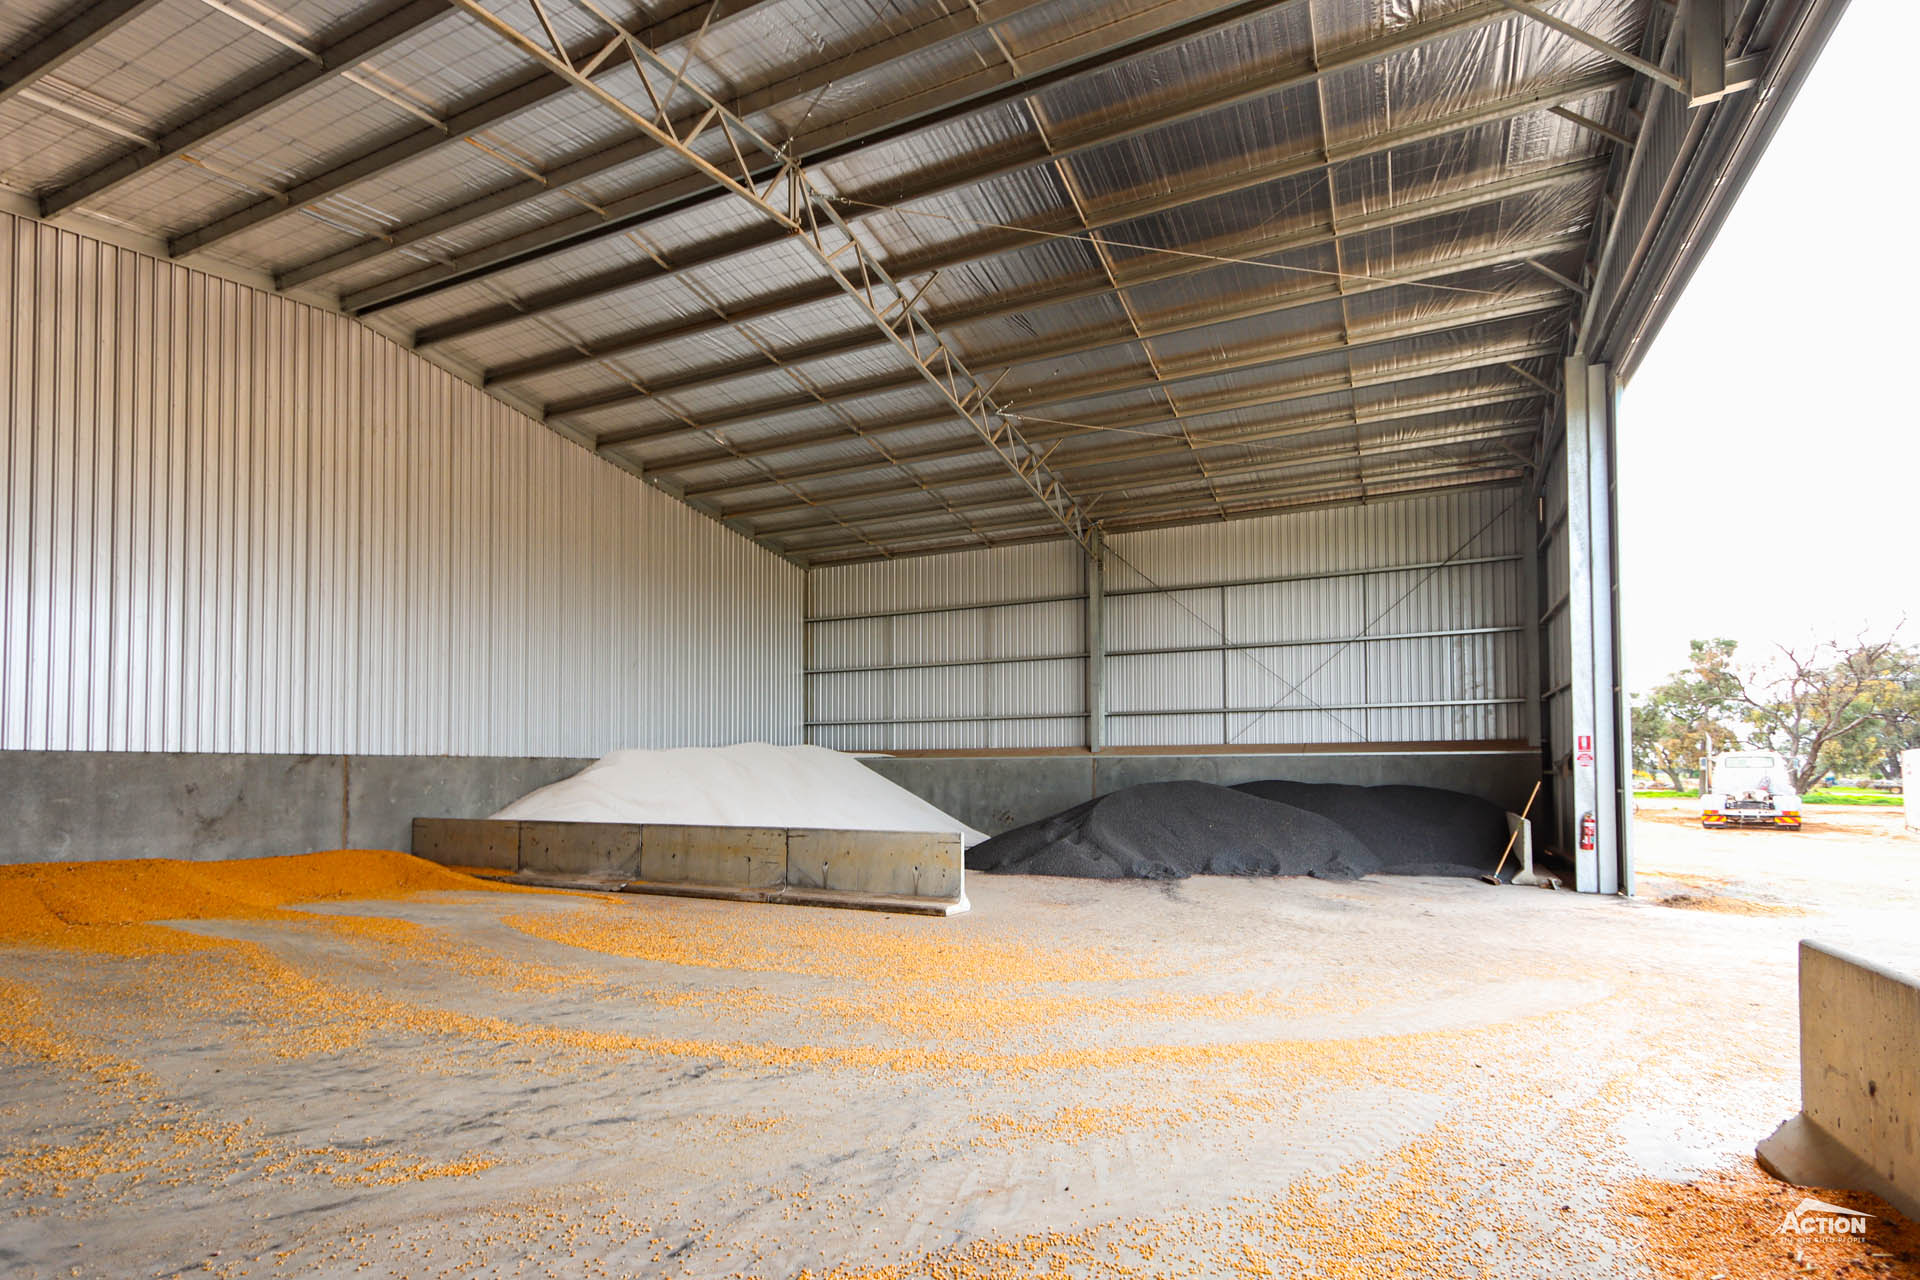
Segregating your fertiliser shed with concrete panels allows you to store more than one product in your shed.
There are two main ways to achieve this: permanent dividing concrete panels walls or movable t-walls or l-walls.
Movable walls can be the smarter option of the two in terms of providing versatility, storage flexibility and value for money.
This is because permanent segregation is permanent, which means that the overall capacity of your shed is reduced.
As a result, you are limited to the capacity of the segregated areas.
This is why we recommend starting with a bulk storage area and then using movable walls to suit your requirements.
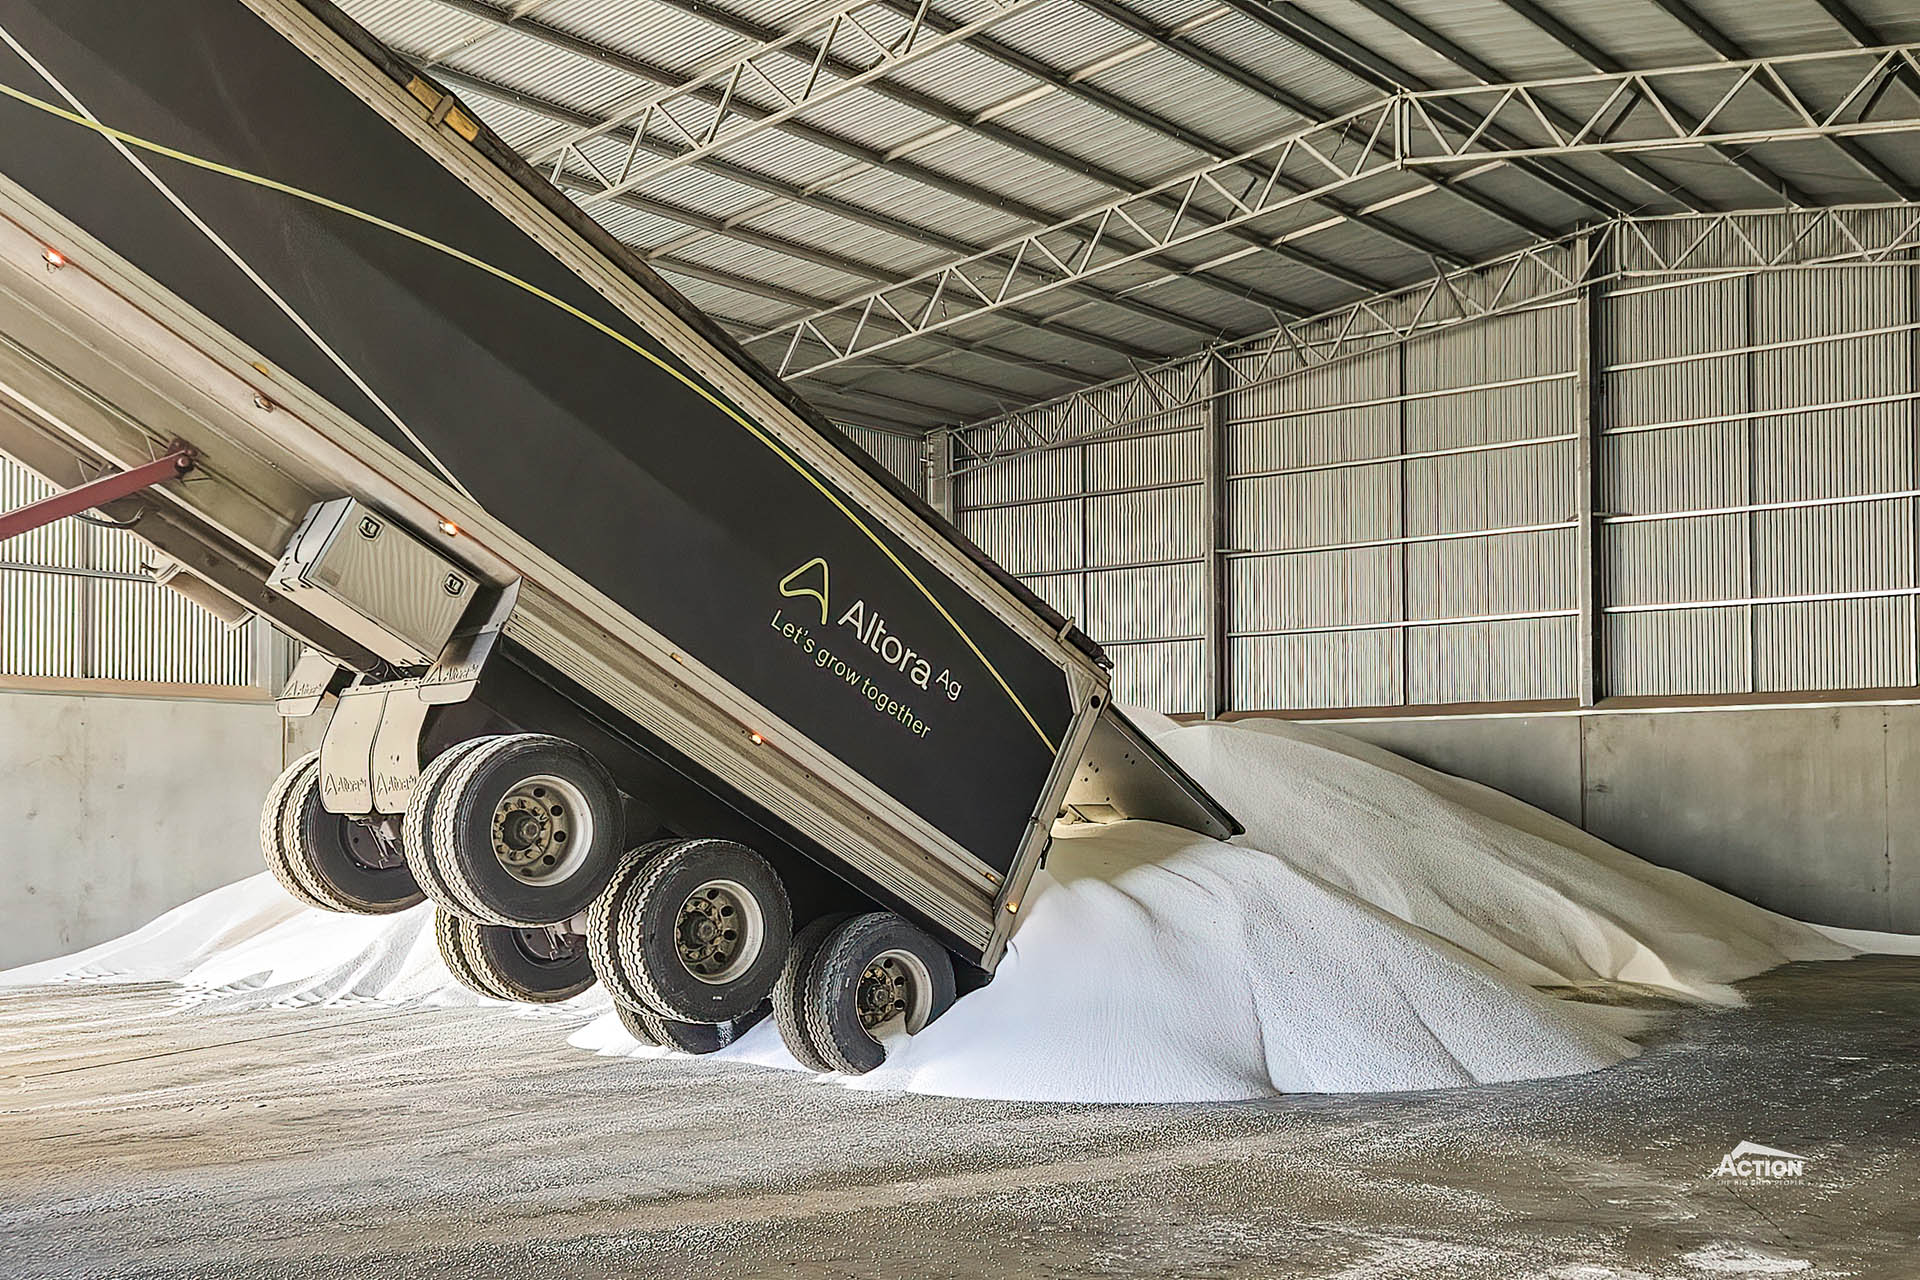
For example, this could allow you to store Urea, MAP and DAP ahead of cropping and then change it up as your requirements change, such as storing one bulk product.
Or even clearing the shed out ready for short-term grain storage at harvest to allow you to get the crop off faster and avoid long lines at receival sites.
Having said that, permanent panels can still form part of a versatile fertiliser shed design, particularly if you have a clear picture of your storage requirements going forward and what you want to achieve.
The projects below are all great examples of this and also show how permanent panels can be used with different shed configurations.


3
3. Pay Attention To Access
Size matters with any shed build (is a shed ever too big?) and particularly when it comes to access and functionality.
It plays a role in creating a versatile fertiliser shed design by simply making sure your shed is accessible for all the different uses.
Do you intend to use your fertiliser shed for grain storage or machinery storage? Or are you storing different products with different loading and unloading requirements?
If this is the case, consider the access requirements to make sure your shed can be used in these ways.
So, what details do you need to address?
Let’s start with arguably the most important detail – the shed height.
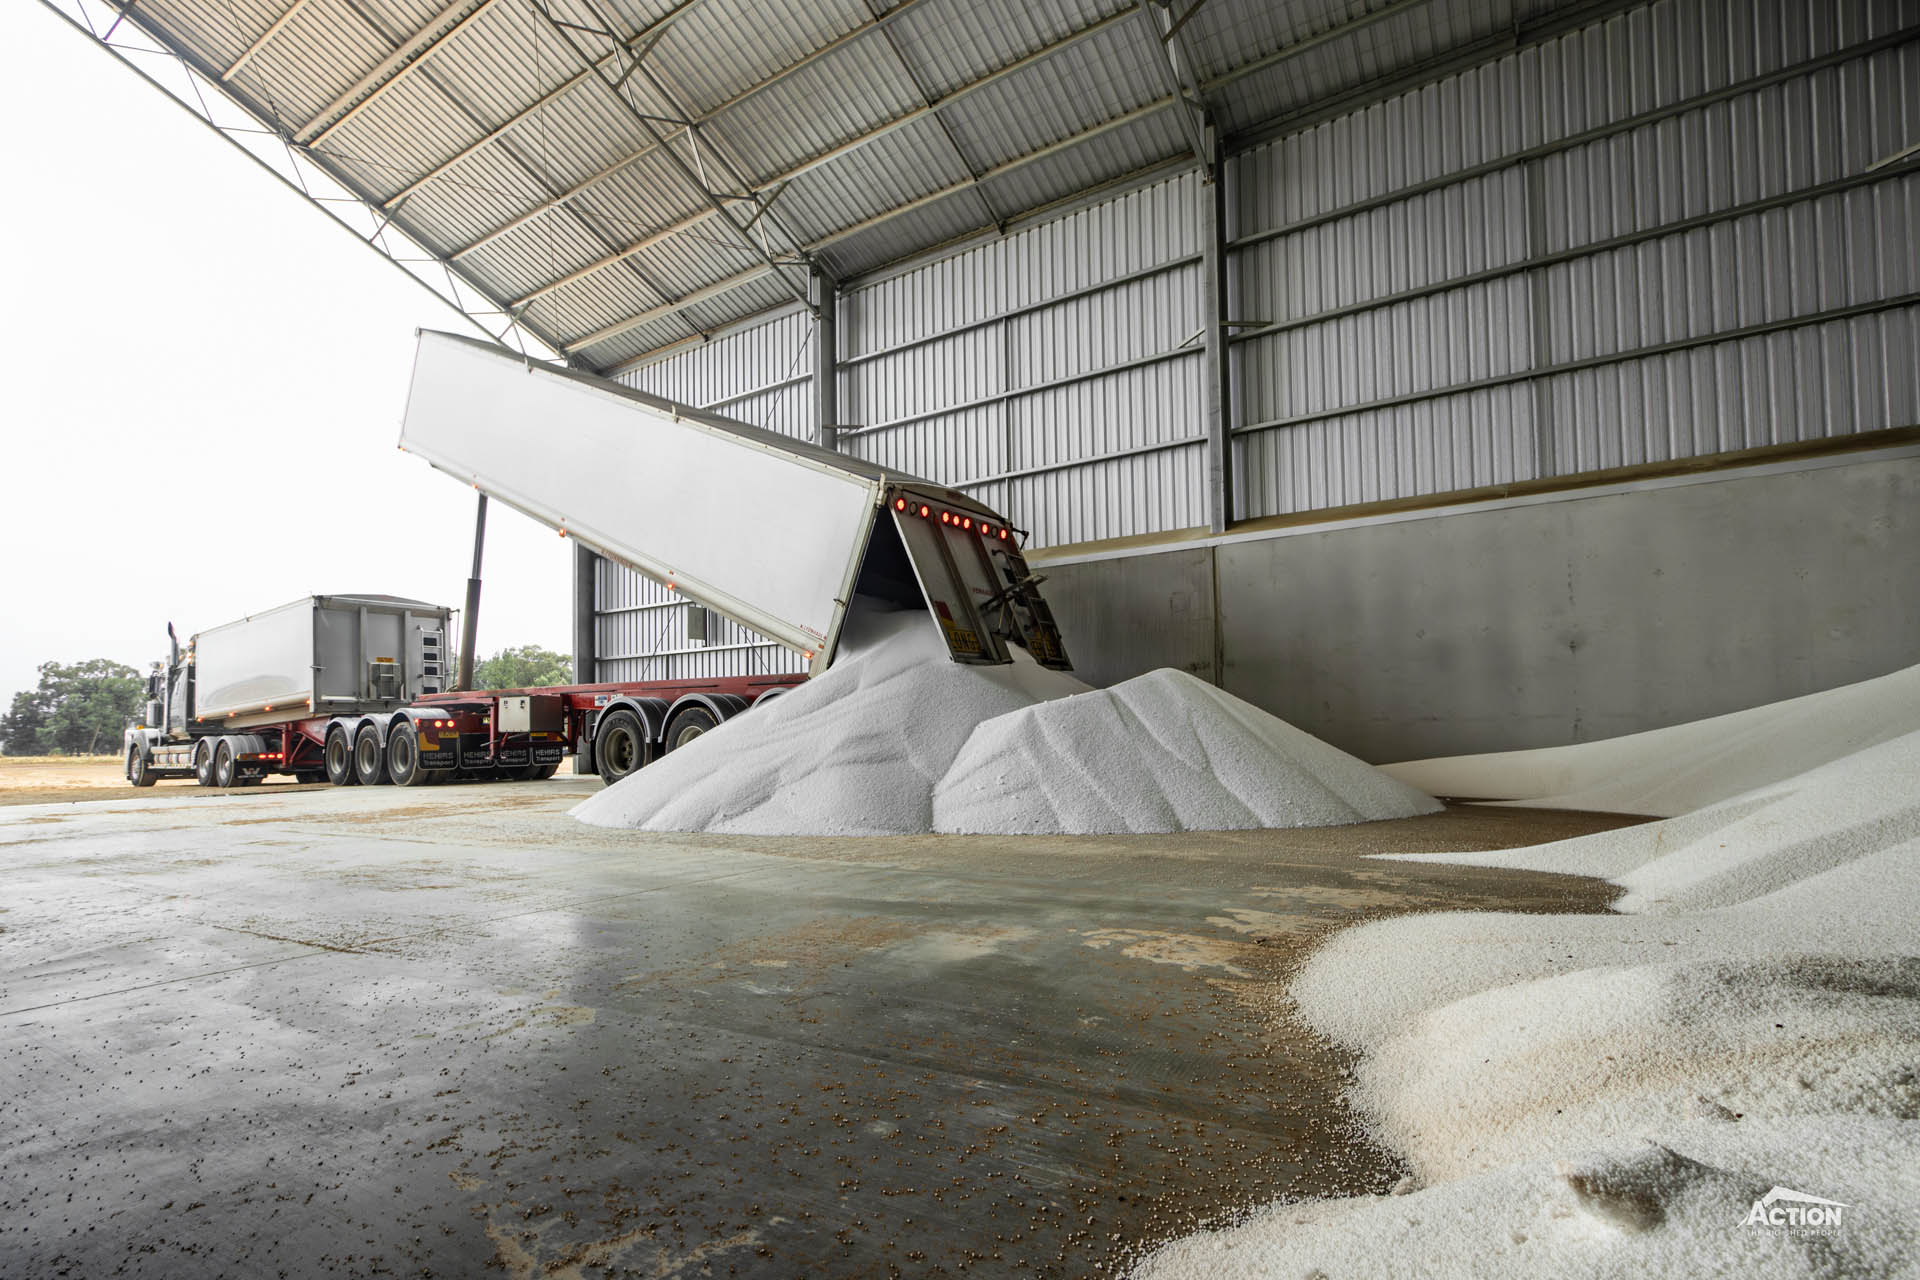
The height of your shed can’t be changed once your shed is installed and will impact machinery clearance and how you access, load and unload the shed.
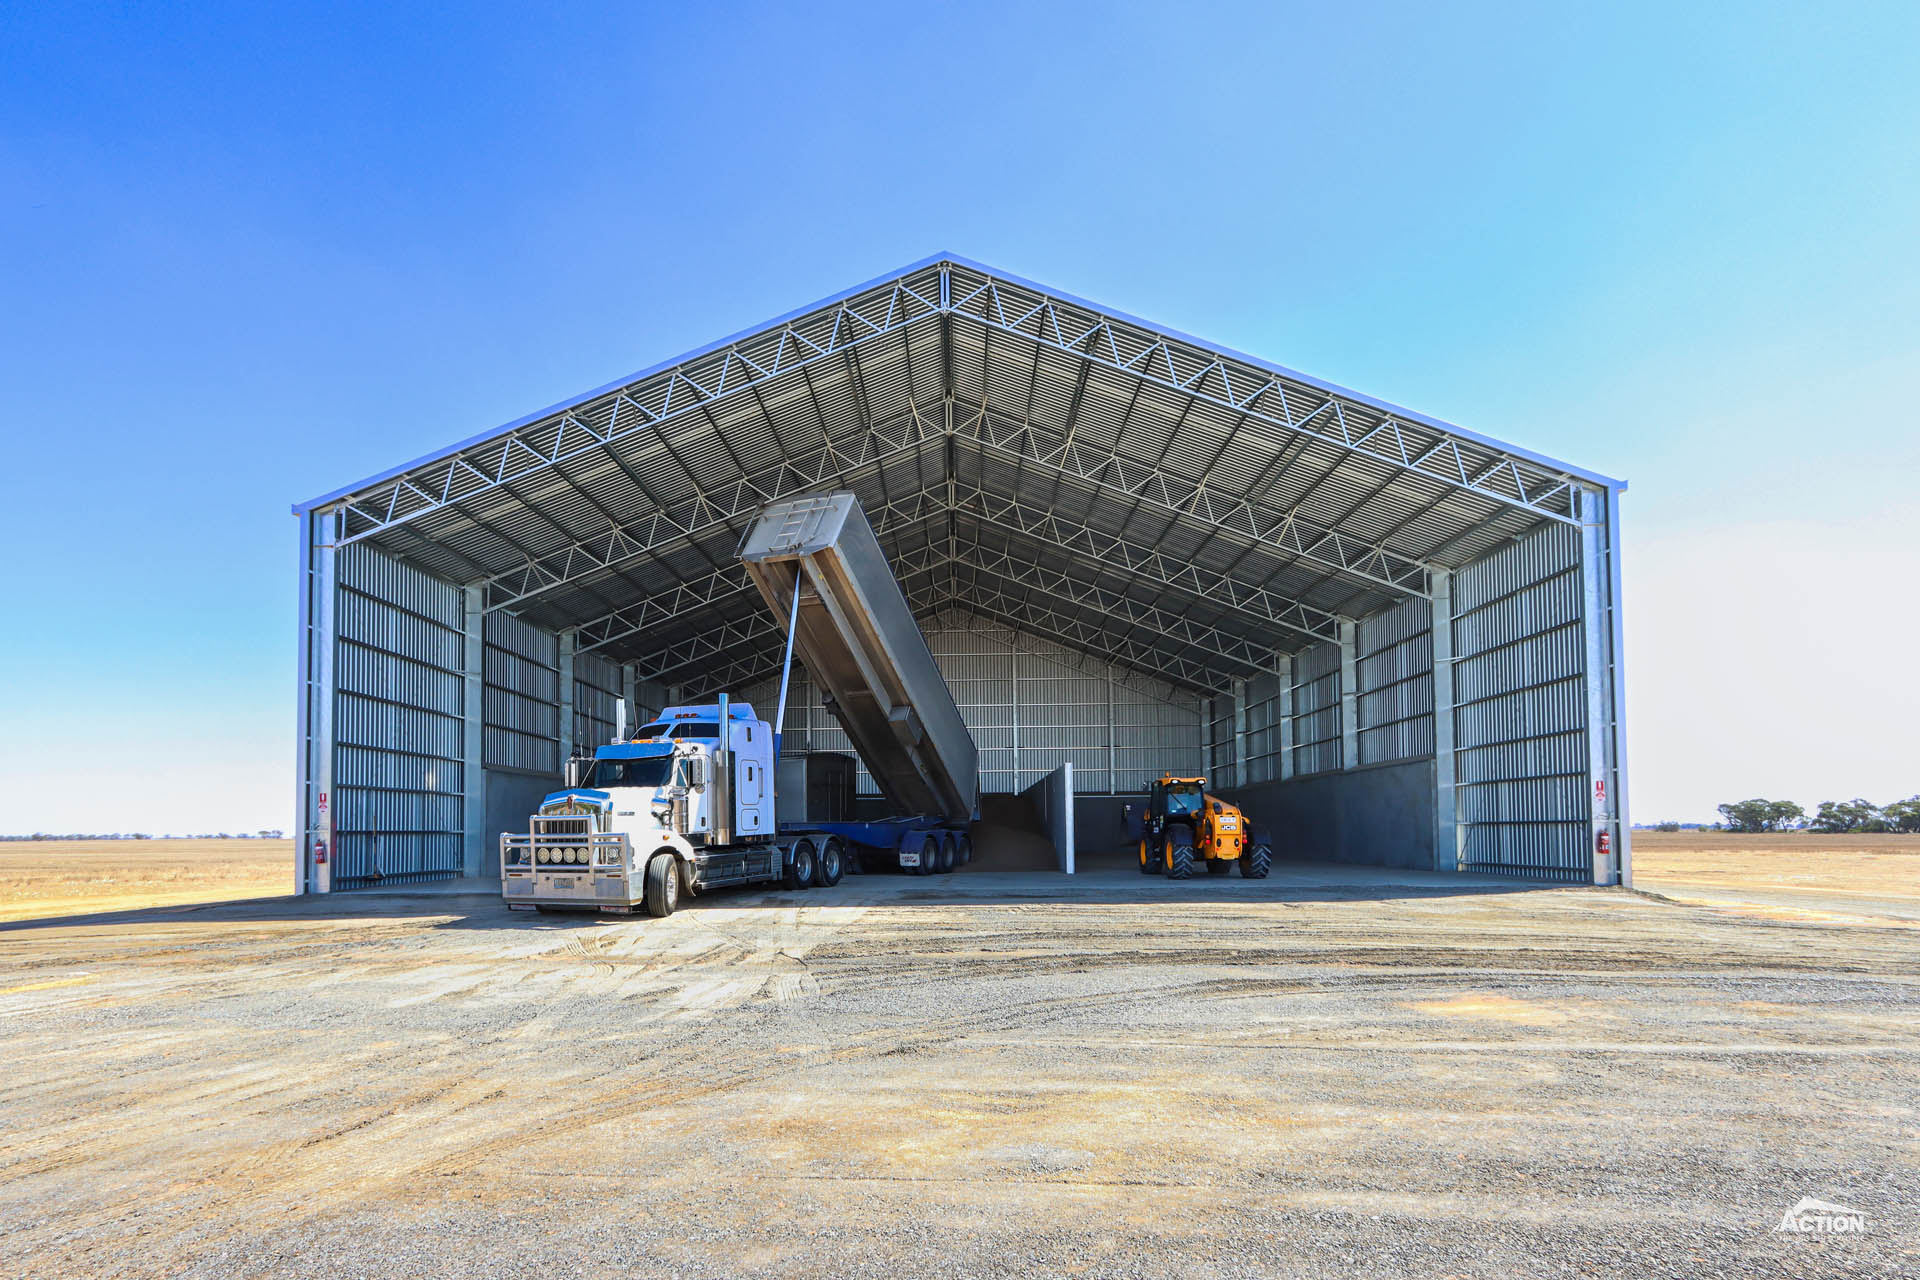
While most machinery requires a minimum clearance height of six metres, if you are tipping inside your shed, you will need to increase the height.
Common heights for both grain sheds and fertiliser sheds include 7 metres, 7.5 metres, 8 metres and 8.5 metres.
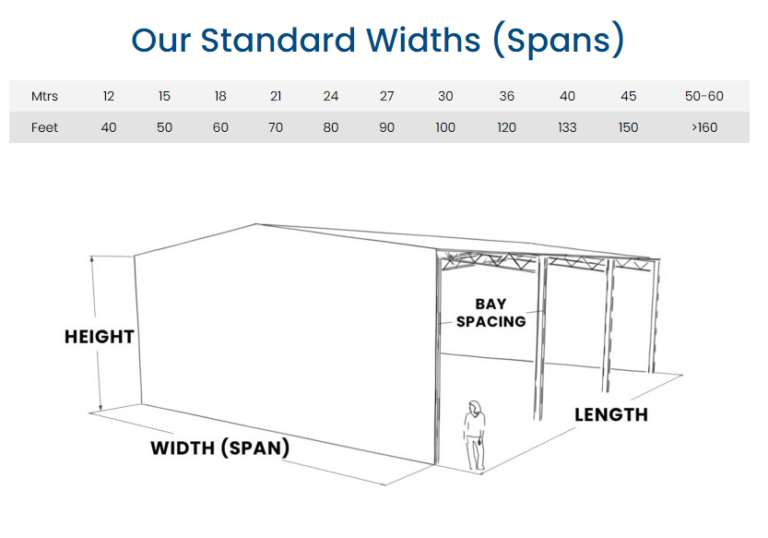
You will also need to consider the roof pitch and shed span, along with the height.
For example, a 21-degree roof pitch works well for both fertiliser sheds and grain sheds to accommodate tipping inside the shed and the angle of repose of grain.

When it comes to your shed span, common widths for bulk storage sheds are 24 metres wide and 27 metres wide.
These both work well for tipping inside the shed.
The 27-metre span is also a common choice for large-scale fertiliser and grain sheds as it allows room for trucks to turn inside the shed.
If you are tipping inside your shed and choose a narrower span, you will likely need to increase the shed height and roof pitch.
Our building consultants are always happy to run the numbers on different options to help you determine what sizes will work best.
Finally, you need to consider how you will be accessing the shed.
This will determine sliding door placement.
Generally, accessing the shed from the long side works well for dedicated segregated fertiliser sheds.
However, access from the gable ends is typically the best practice for versatile bulk storage sheds.
4
4. Choose Best-Practice Panel Size
On a similar note to access requirements, panel height is another important consideration for versatile grain/fertiliser shed designs.
If you intend to store grain in your fertiliser shed, we recommend making sure the panel height works with the angle of repose of the grain you are storing.
3-metre panels work well, however, you could also consider upsizing your concrete panel to 3.5 metres.
While upsizing panels is an extra cost, it is a great way to future-proof your shed design and allows you to store more grain on-farm ready to take advantage of market opportunities.
You can learn about concrete panel sizes here – What Are The Best Concrete Panel Sizes For Farm Sheds?
5
5. Install A Canopy
We love a farm shed canopy – and so do our customers!
In fact, canopies are easily the number one farm shed design option
And they are popular for a reason.
A farm shed canopy is cost-effective and functional – and can be used to create a versatile fertiliser shed design.
Let’s refer back to the Darcra Farming project example we mentioned earlier.


This project incorporates two 12 metre canopies on each long side that can be used for an undercover maintenance area or for short-term hay storage at harvest.
And that’s not to mention the benefit of trucks being able to pull up under cover – with no reversing required and no columns in the way!
Similarly, John Bennett has made provision for a canopy to be added in the future to provide sheltered access to the shed and extra temporary hay storage space.
So, it could pay to consider including a canopy to increase the functionality and versatility.
6
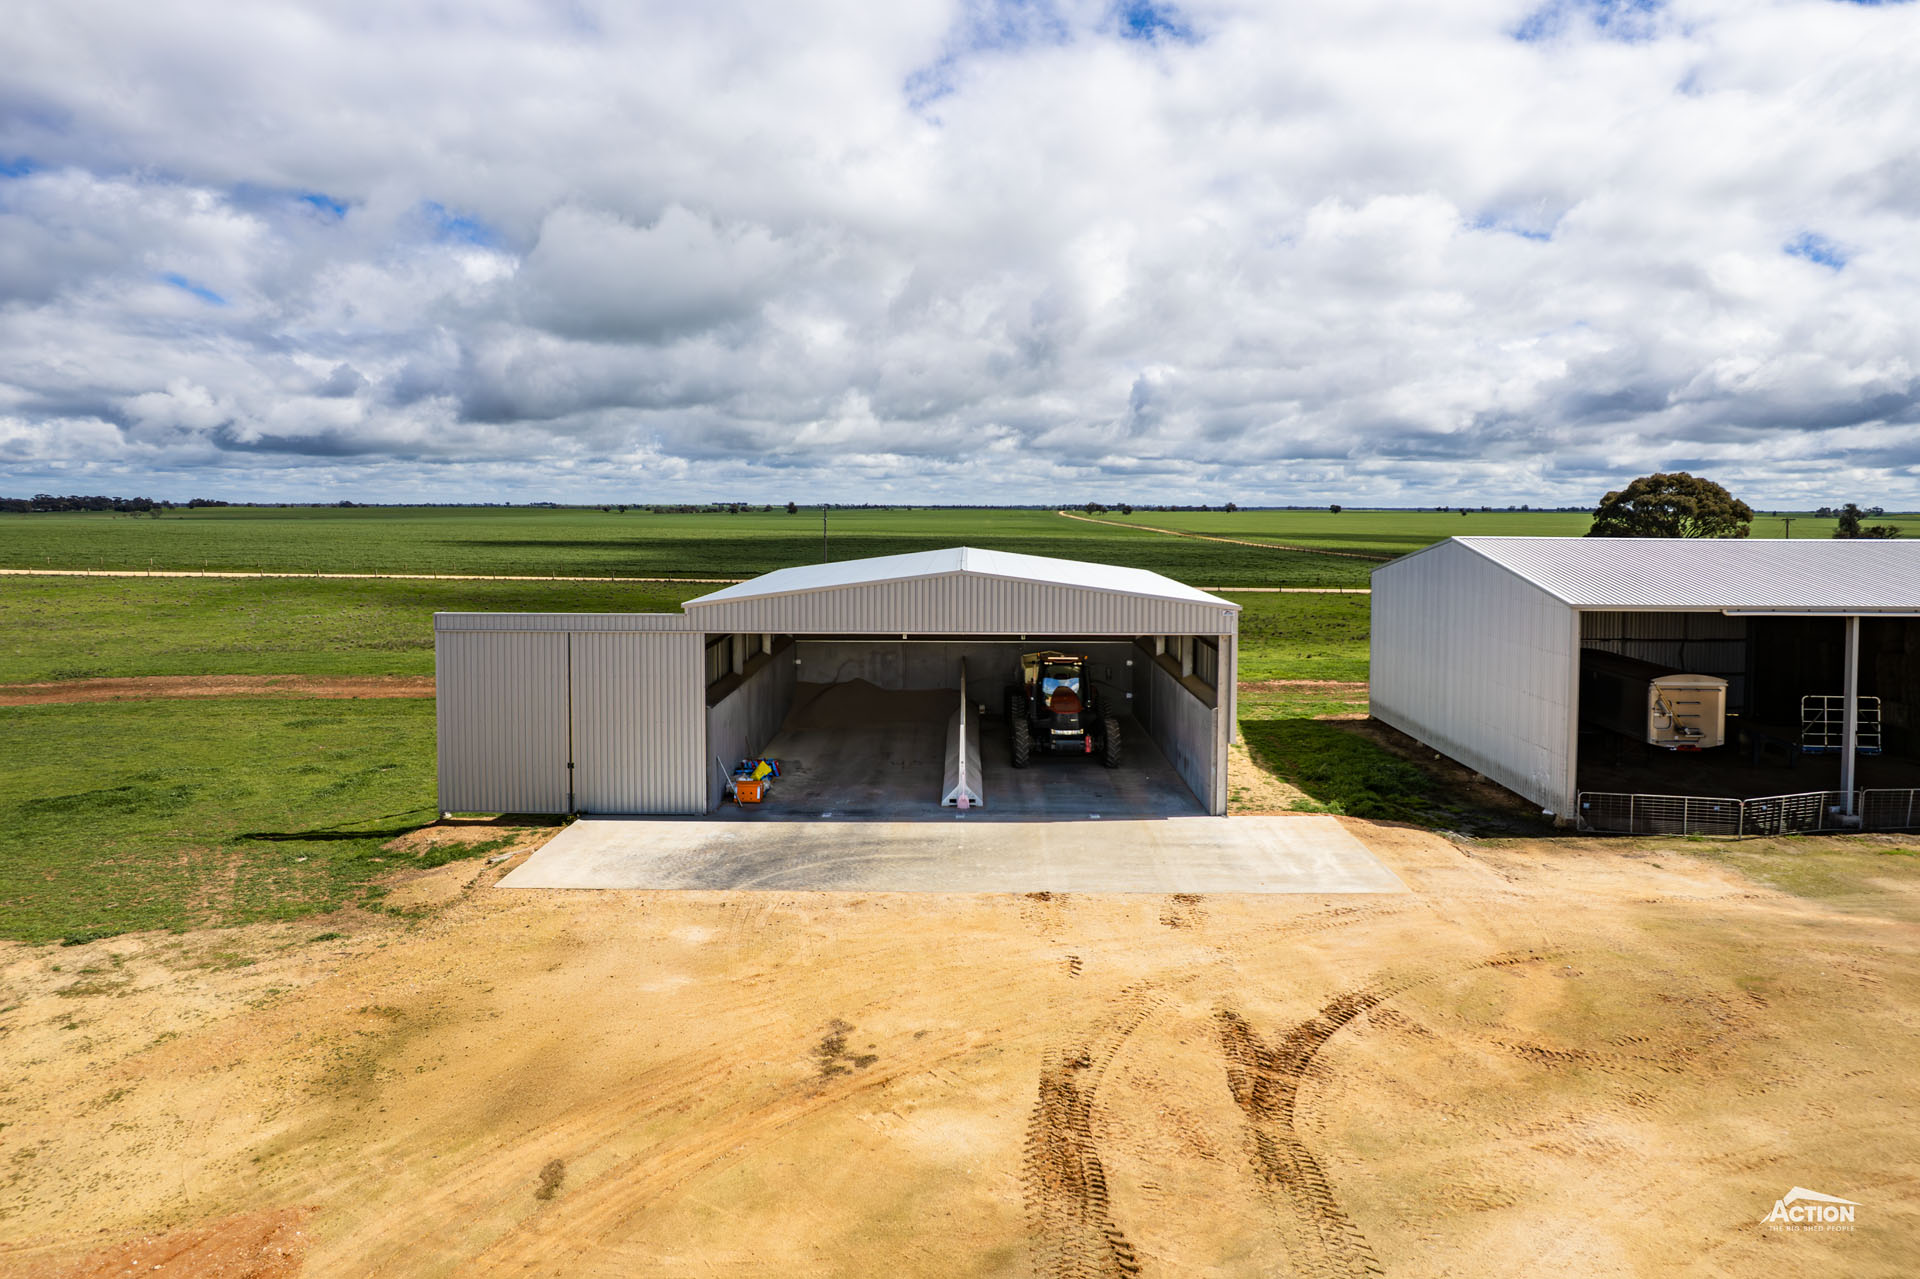
6. Multi-Use Shed For Small-Scale Storage
You can’t get much more versatile than a purpose-built multi-use shed!
And we have been building some great examples recently.
This approach is often recommended for small-scale fertiliser storage.
This is because the smallest fertiliser shed we build has a 200 tonne capacity.
This size shed can have a higher cost per tonne (simply because the bigger the shed, the more cost-effective it becomes and vice versa) and can also be limited in its versatility.
So, it could be worth running the sums on dedicating a bay or two for fertiliser storage in a multi-use shed.
For example, an open front shed with several enclosed concrete panel bays is a popular option.
The benefits of this option include that the shed is easily extended in the future, works out better cost-wise than building two standalone sheds, and is more versatile!
For example, the fertiliser storage area in the projects below could be repurposed to a workshop to create a combined machinery storage and maintenance set-up.


Or, if you already have existing shed infrastructure that is underutilized, you could retrofit concrete panels to a bay.
As we mentioned earlier, a fertiliser shed doesn’t have to be big to be versatile and provide value to your operations.
So, we hope this discussion on creating a versatile fertiliser shed design has given you some ideas!
So, that’s a wrap on ways to create a versatile fertiliser shed design!
For more articles like this, check out the Learning Hub.
Or to get your fertiliser shed project underway, call us on 1800 687 888.