
Thinking ahead to the upcoming calving season? Preparing your calving shed?
Having well-prepared and set-up facilities at calving can help provide you with peace of mind, make your job easier and create a low-stress environment for your cows.
Now is an excellent time to be actioning your plans for shed upgrades, maintenance and new builds.
To help get you started on preparing your calving shed, we have created a checklist of important considerations, from ventilation through to corrosion prevention.
We hope this is a useful resource for you!
Preparing Your Calving Shed Checklist
1
Plan Site & Shed Access
It can be very frustrating to have limited access to your calving shed, whether it is due to poorly prepared access roads or impractical access points.
Address site access in your initial project planning and ensure the main access roads are upgraded during the site preparation stage and are maintained going forward.
Several design details can be used to help ensure your shed is easily accessible. These include sliding door openings, open gable ends, bay widths and the height of the shed.
For example, ensure that the height provides enough clearance for machinery access when cleaning out the shed.
2
Choose & Prepare Your Site
There are several components to keep in mind when it comes to the site for your calving shed
This includes the initial site selection decision and the site preparation ahead of the installation.
When it comes to selecting the site for your project, there might already be a logical choice such as replacing your existing infrastructure. If the existing location has worked well for you this can be a good option.
However, if you are starting on a greenfield site – or if you have several possible site locations to choose from – there are a number of factors to keep in mind. These include:
- the direction of the prevailing weather
- the site drainage and slop
- how accessible the site is
For example, the direction of the prevailing weather will help determine the orientation of your shed.
Drainage and accessibility should also be addressed in the site preparation stage.
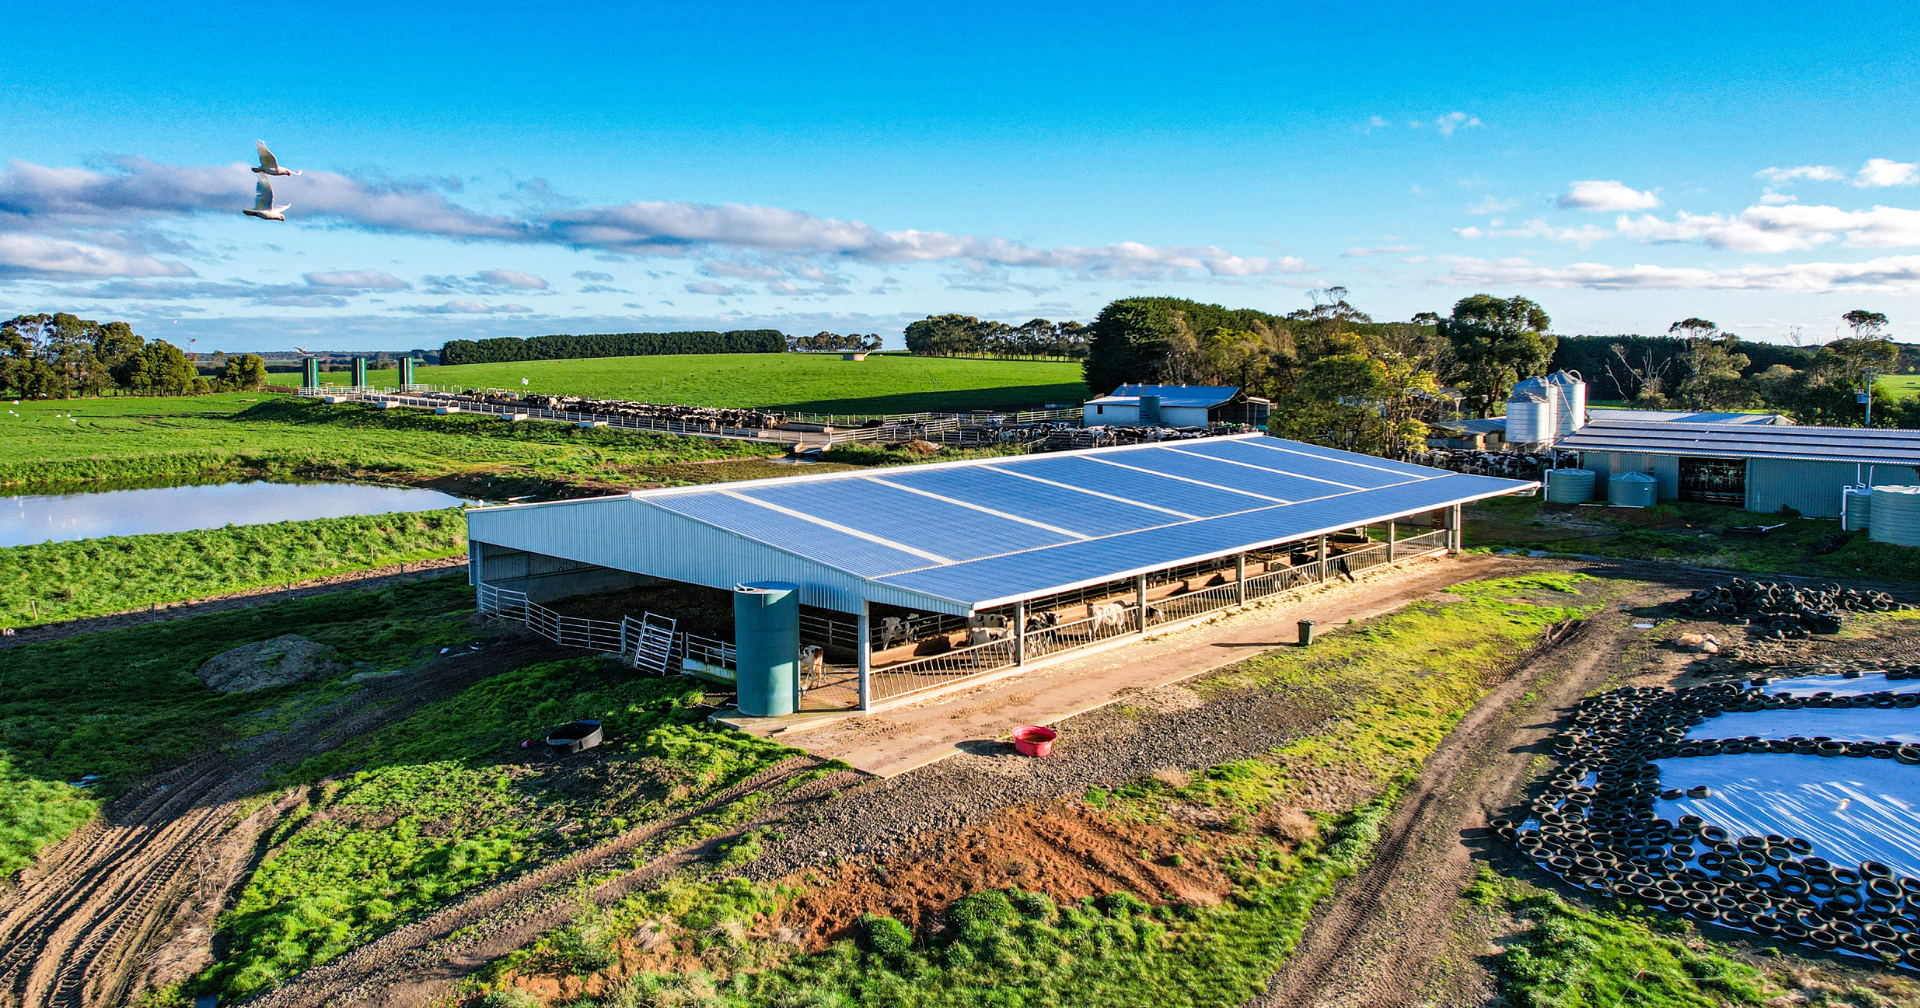
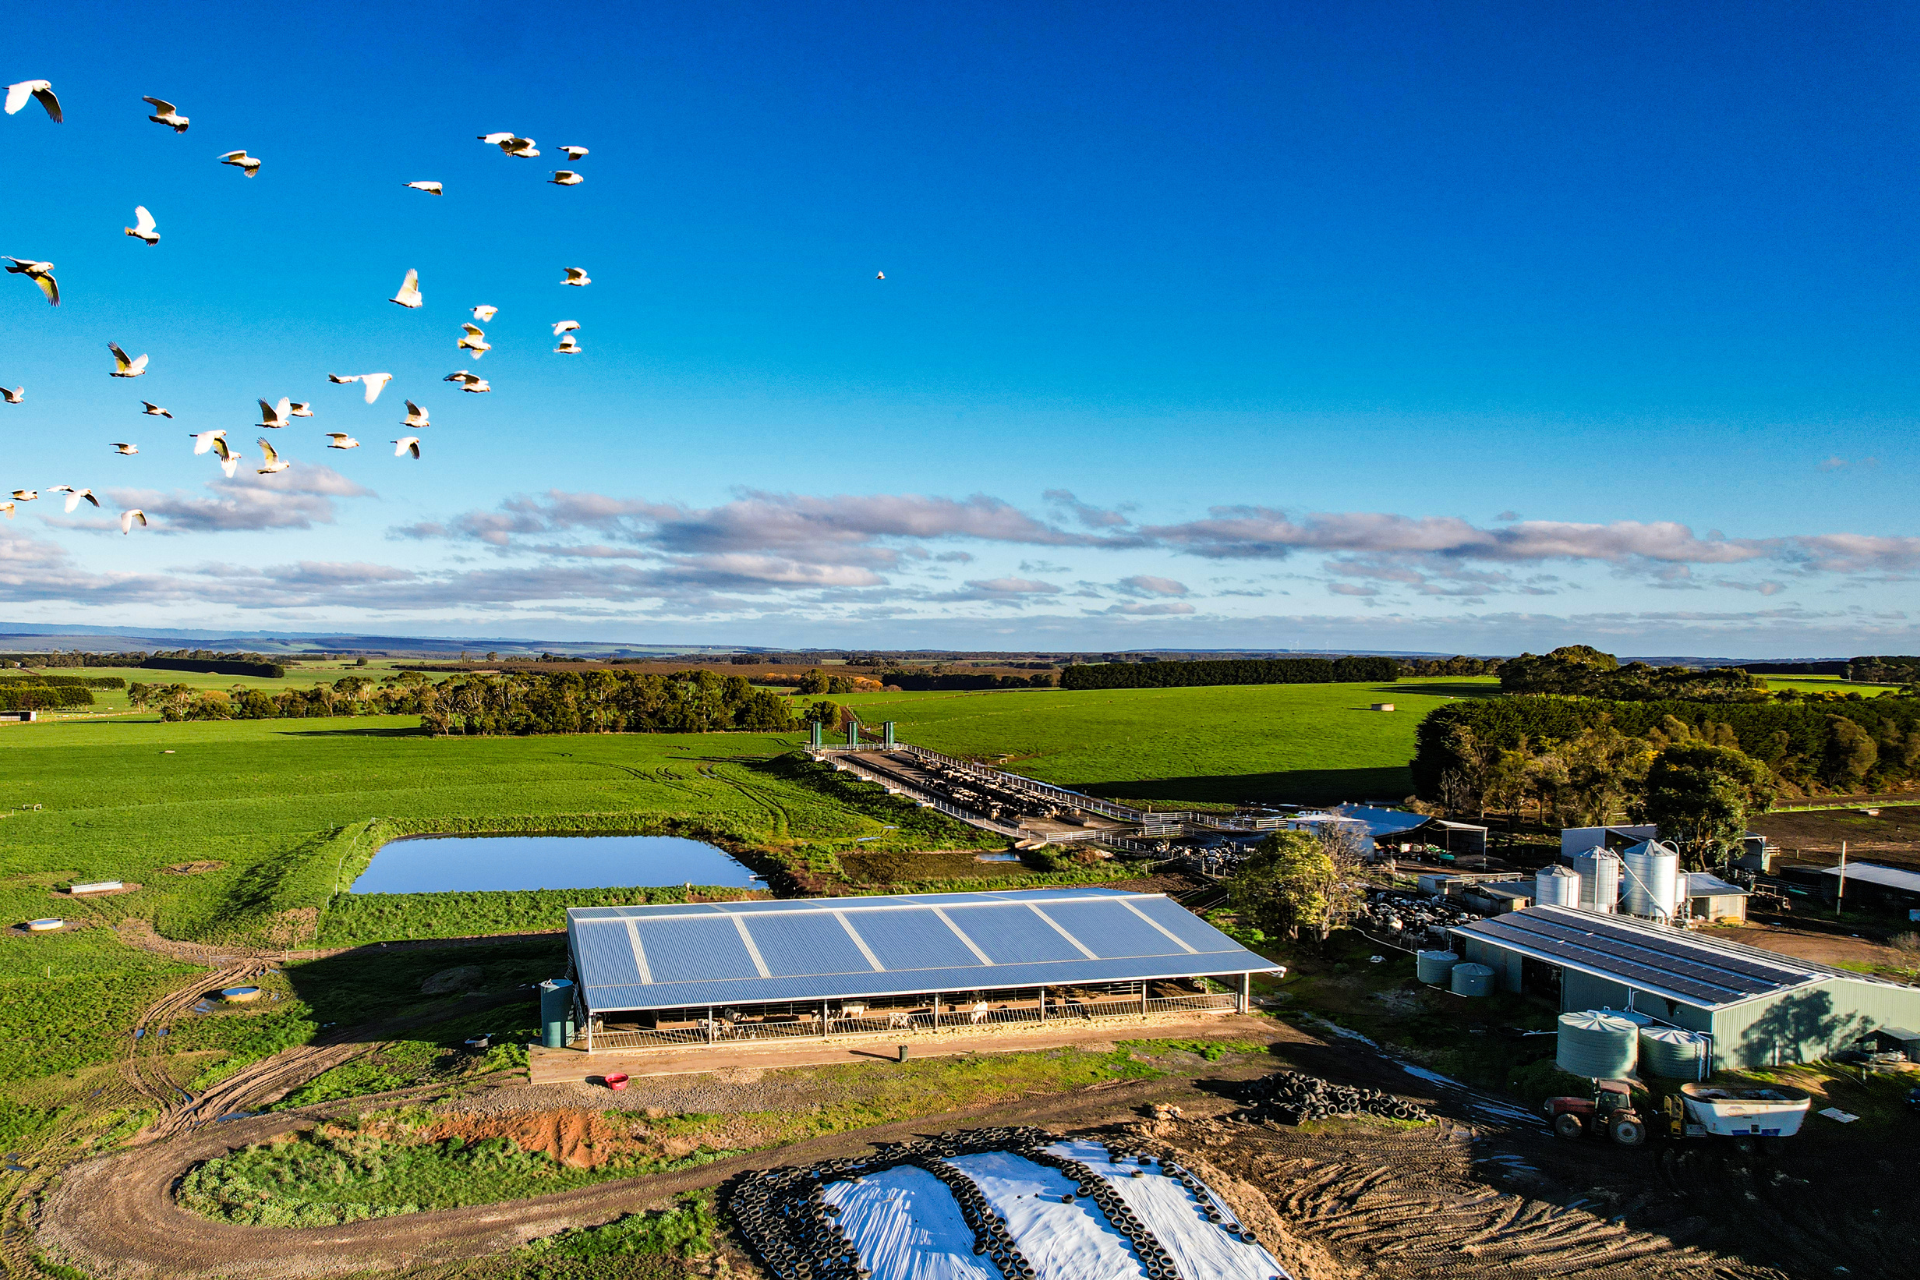
And, site preparation is arguably the most important step for any shed build. Don’t underestimate it!
A well-prepared site with good drainage will ensure the site has all-weather access both during the build and afterwards when you are ready to use the shed. This helps ensure you can safely and easily access your calving shed in wet weather.
Watch the video below to learn about preparing the ideal shed pad.
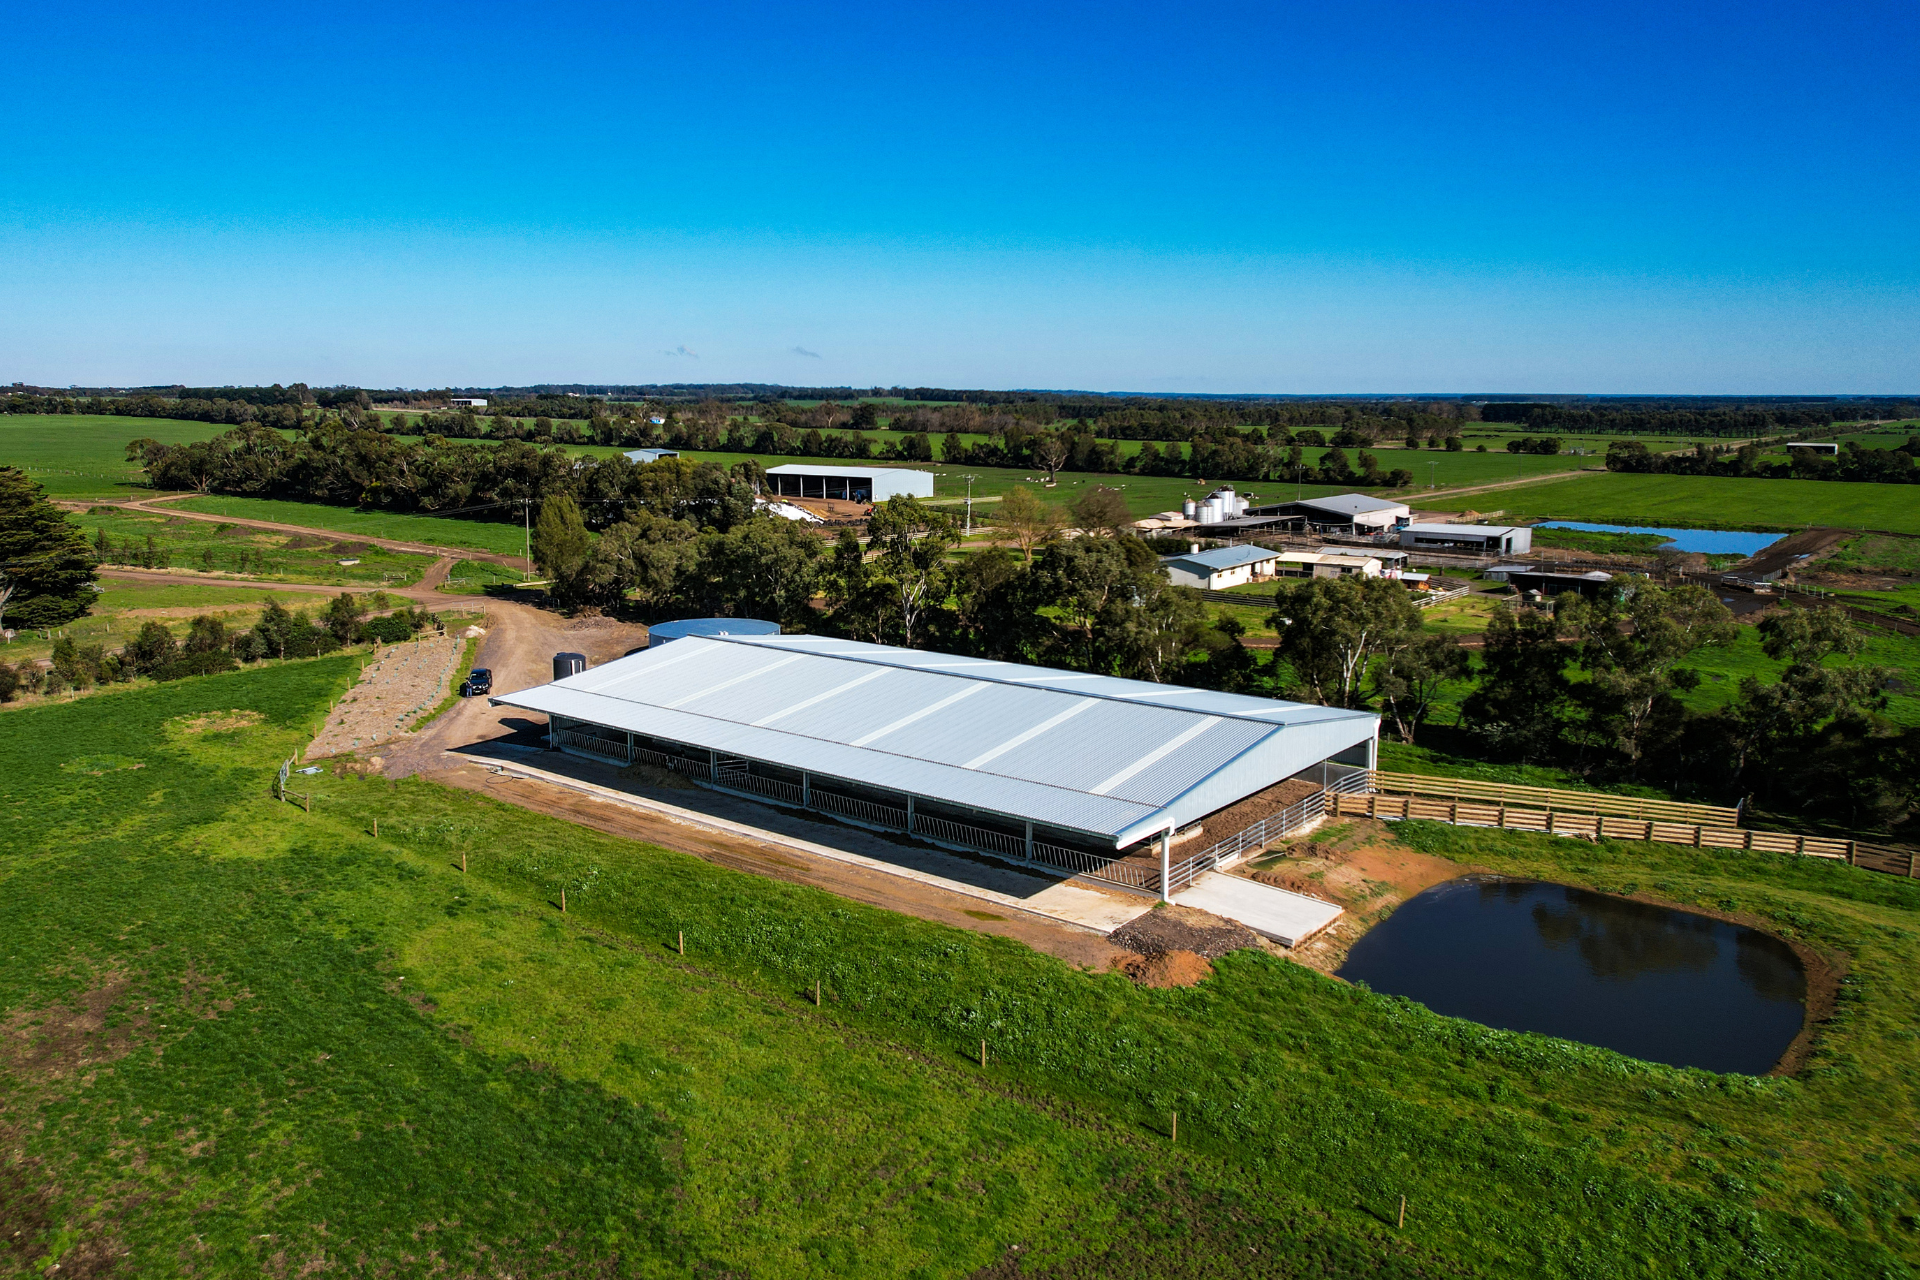
Ben’s Tips For Preparing Your Shed Pad
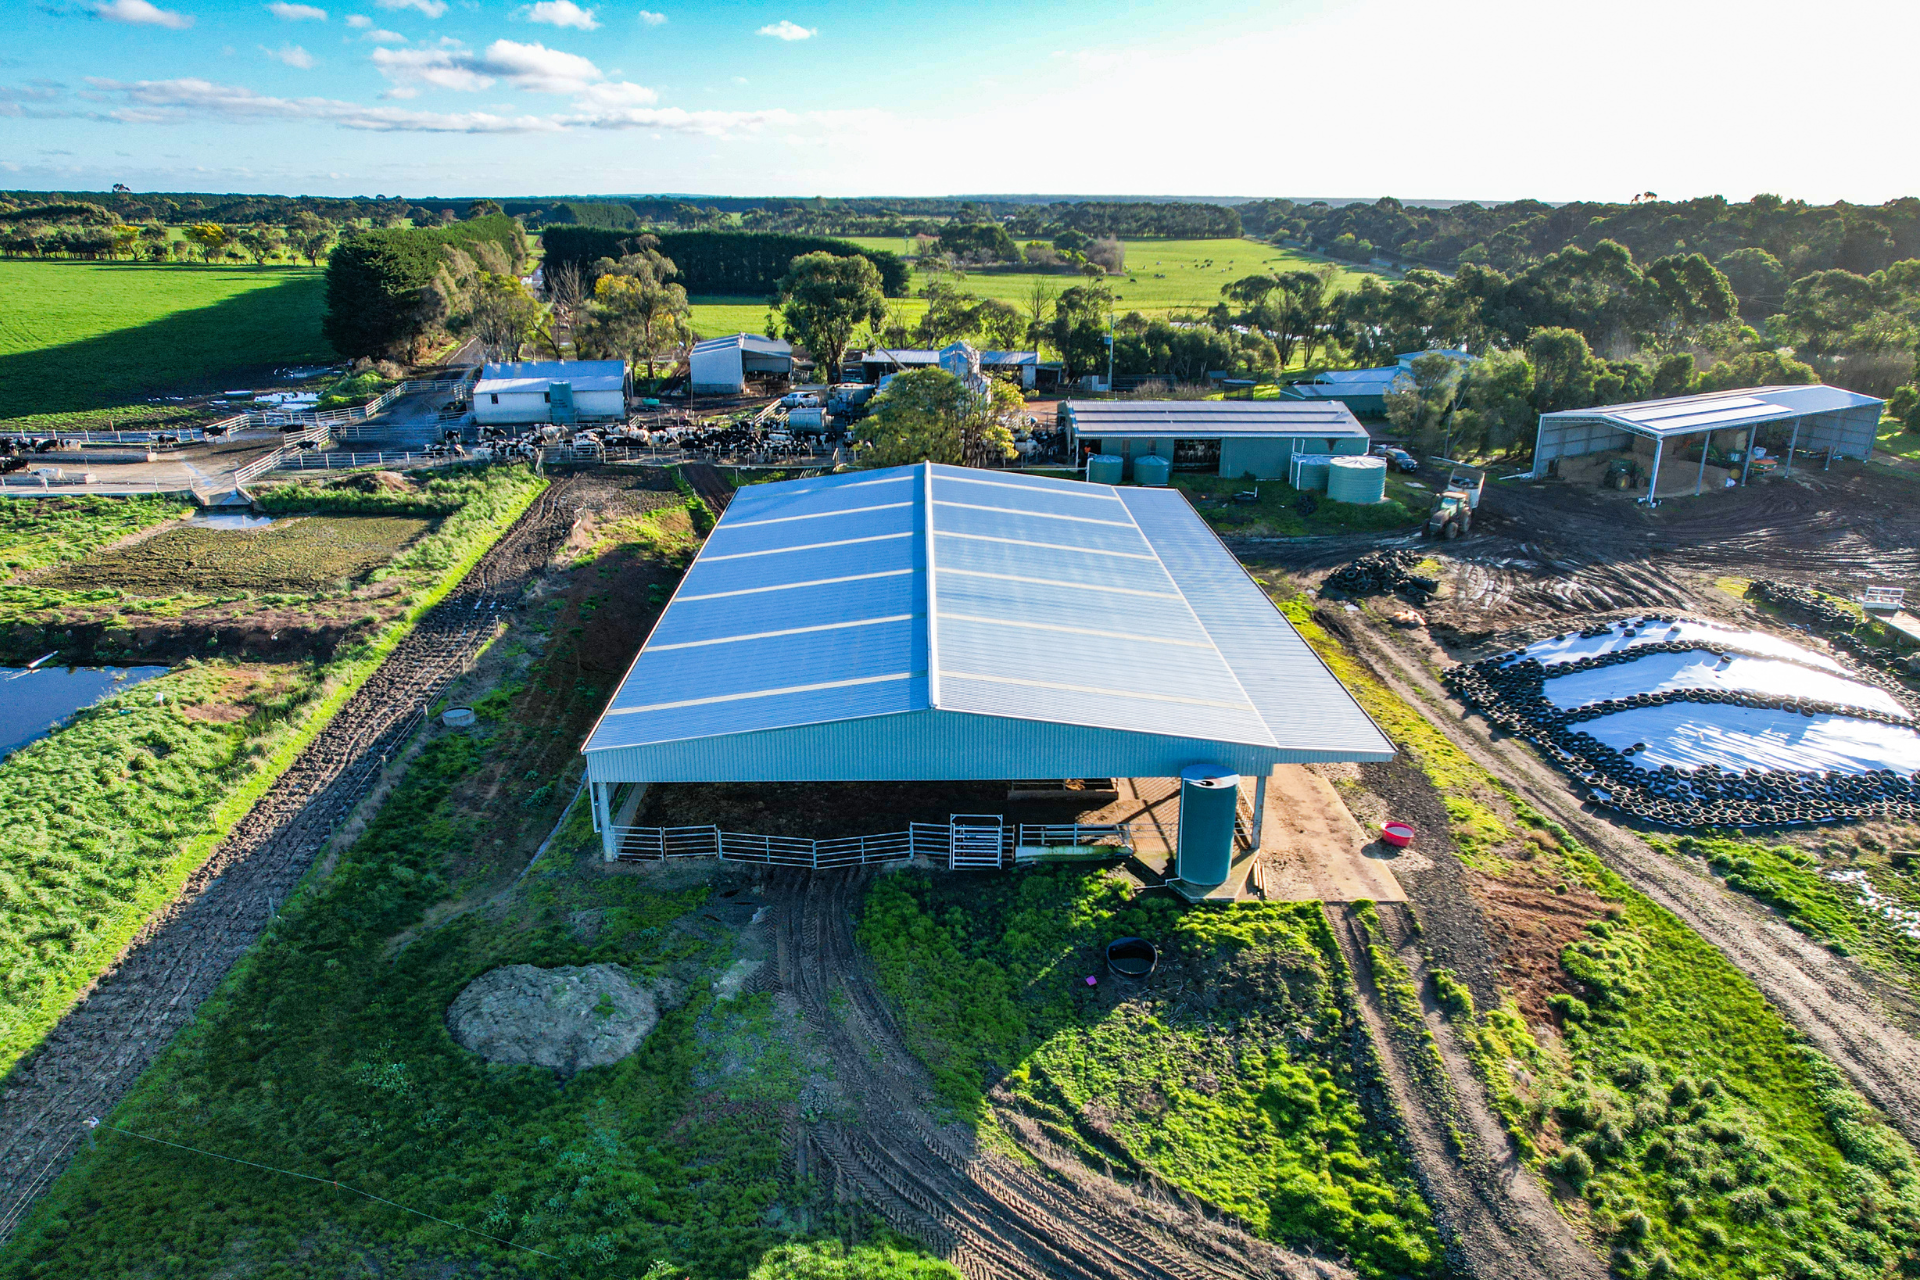
Below are some examples of well-prepared calving shed sites.
3
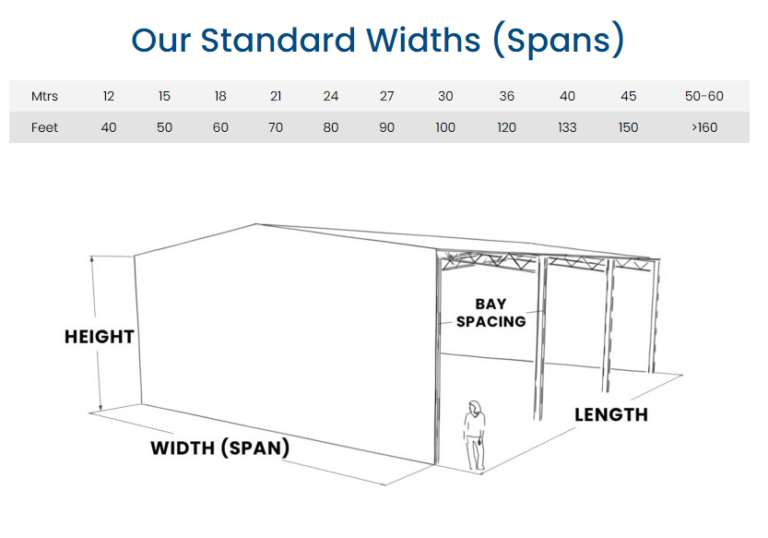
Decide On The Ideal Calving Shed Size
The size that your calving shed needs to be, will be determined by your operational requirements and industry recommendations.
Factors like the number of cows and the length of the calving period will also need to be considered.
There will also need to be adequate bunk space for the cows. This does depend on what feeder system is used, but approx. 300mm is recommended.
There are some recommended square metre rates to follow, too. For example, it is usually best practice to allow approx. 10 square metres per cow. This ensures that there is adequate space for cows to express their natural behaviour patterns and provides a low-stress environment.
Other size considerations include clearance height and bay widths for machinery access.
Popular calving shed sizes include:
- 59.5m (L) x 18m (W) x 4m (H) with 5 metre canopy
- 50m (L) x 24m (W) x 5m (H) with 5 metre canopy
- 82.5m (L) x 24m (W) x 4.2m (H)
- 50m (L) x 27m (W) x 5m (H) with 5 metre canopy
- 59.5m (L) x 30m (W) x 5m (H)
4
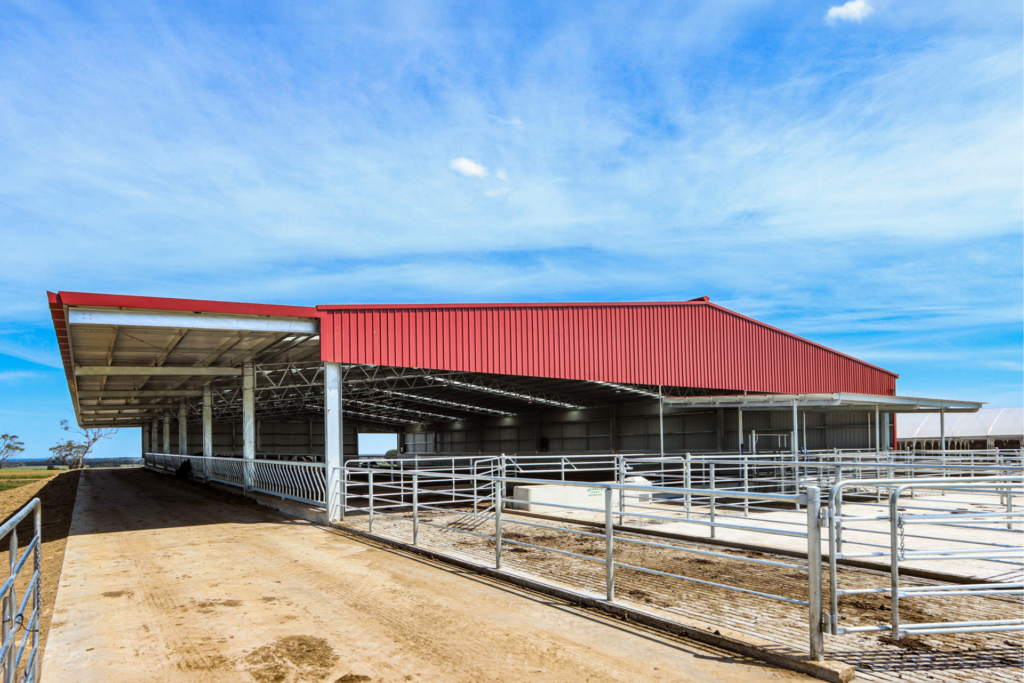
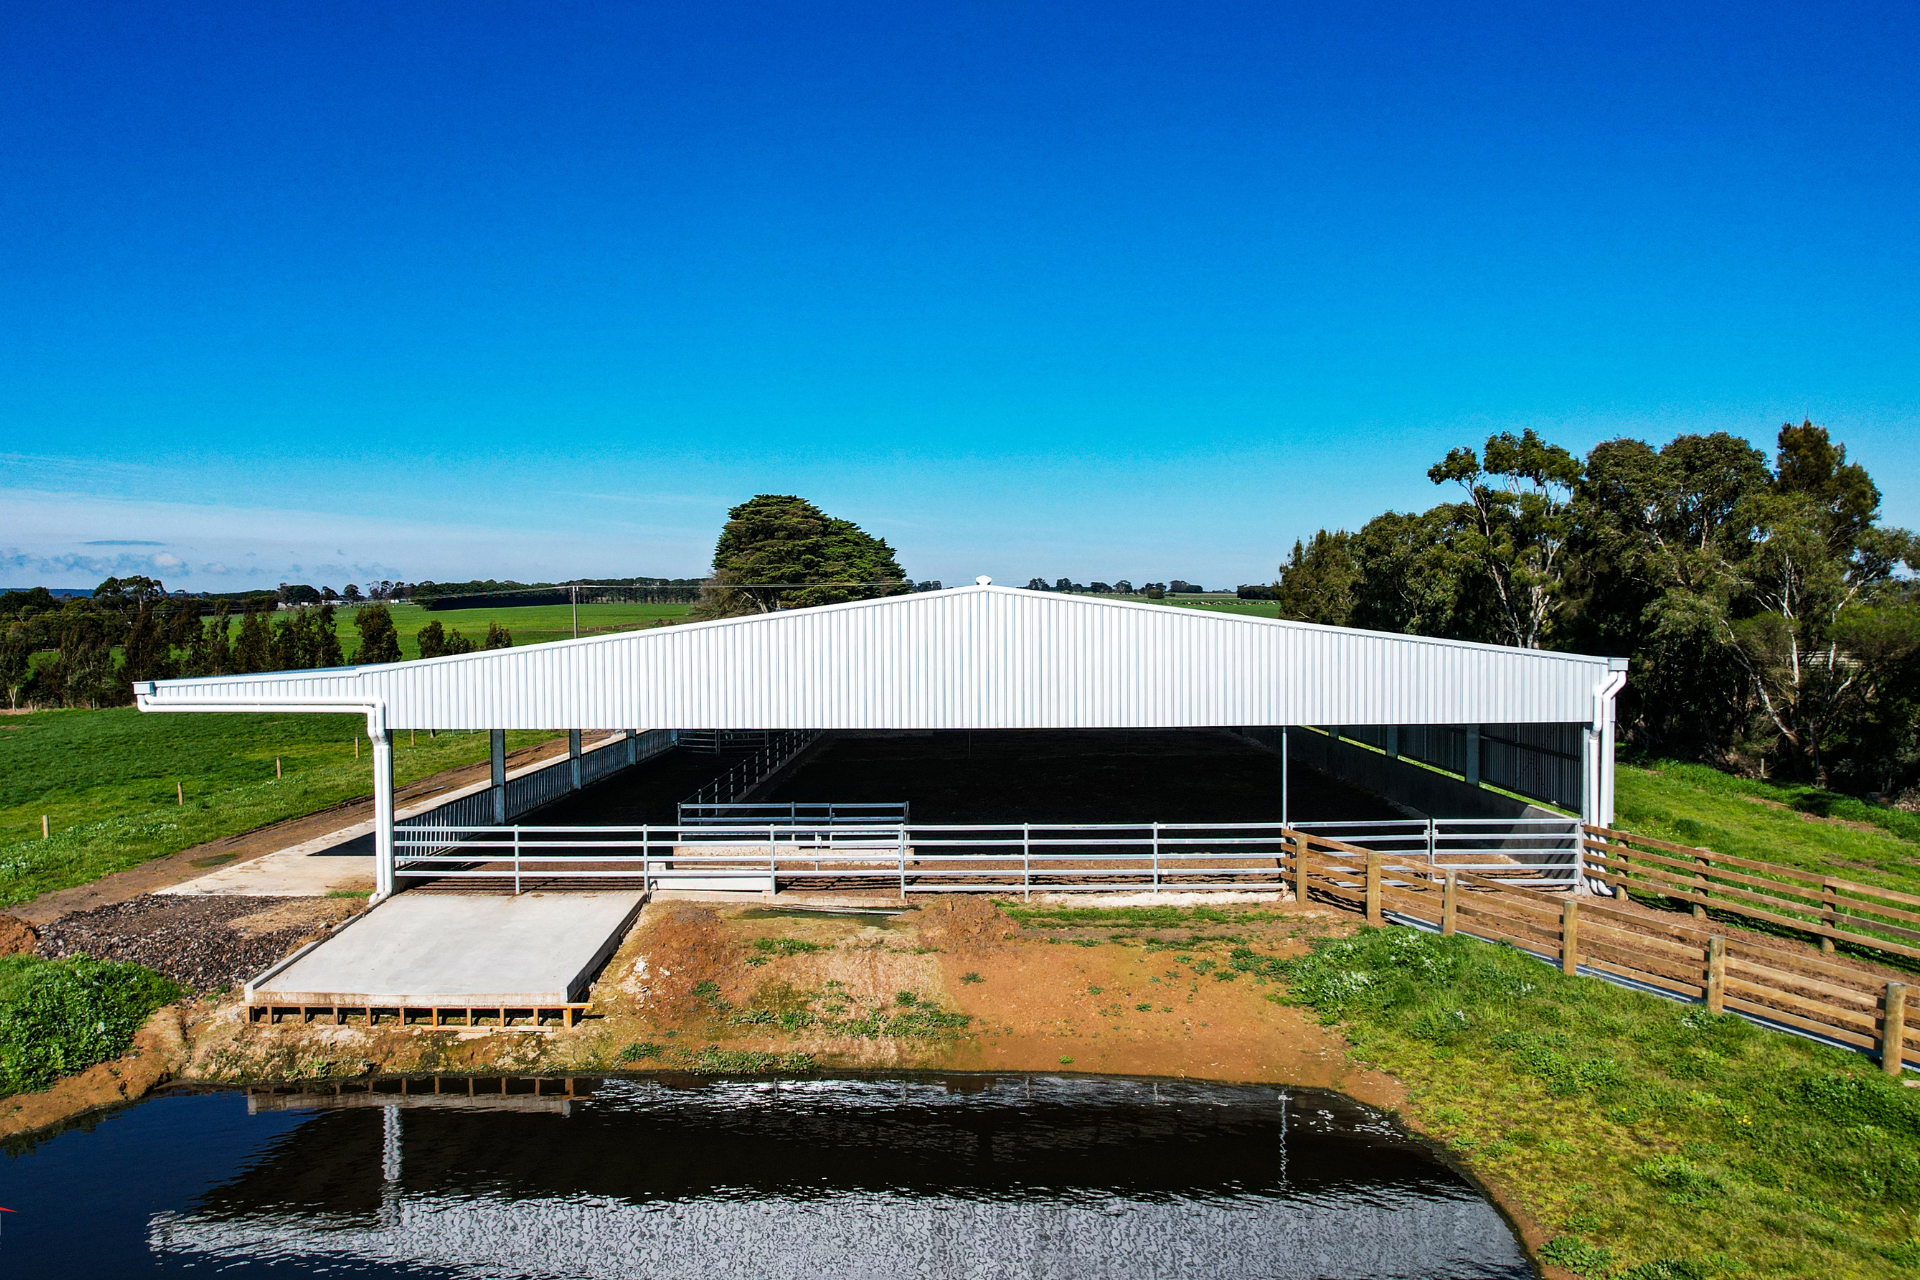
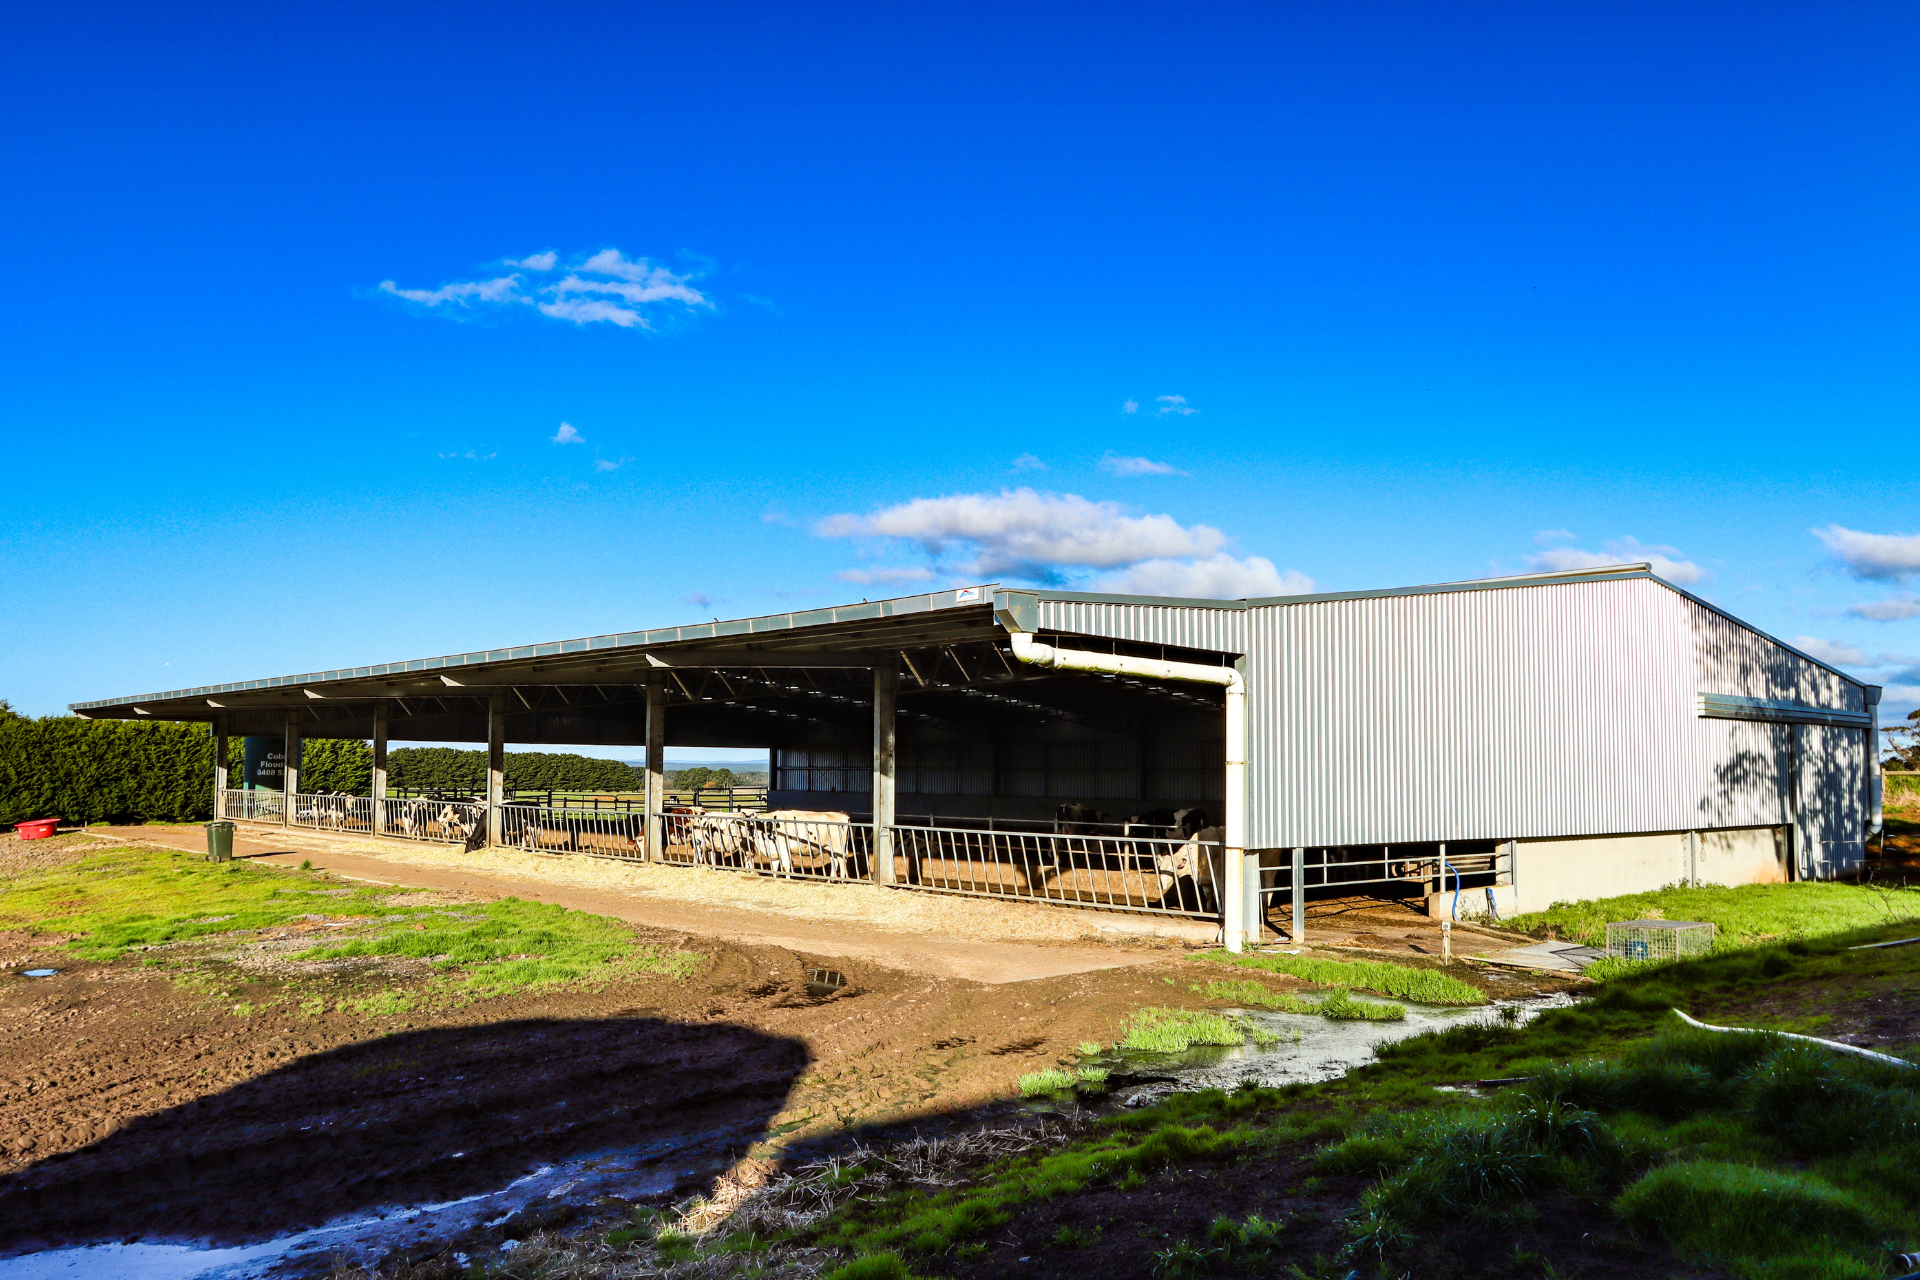
Select A Best-Practice Design
For calving sheds, a two-sided shelter configuration customised with ridge ventilation, sliding door openings, concrete panels and a cantilevered canopy is largely considered the best-practice design.
You can learn more about this design here – Is This The Best-Practice Calving Shed Design?
This design works because it successfully ticks three important boxes:
- Airflow
- Weather protection
- Corrosion protection
Plus, this design can be customised with features and materials like skylights and Colorbond cladding.
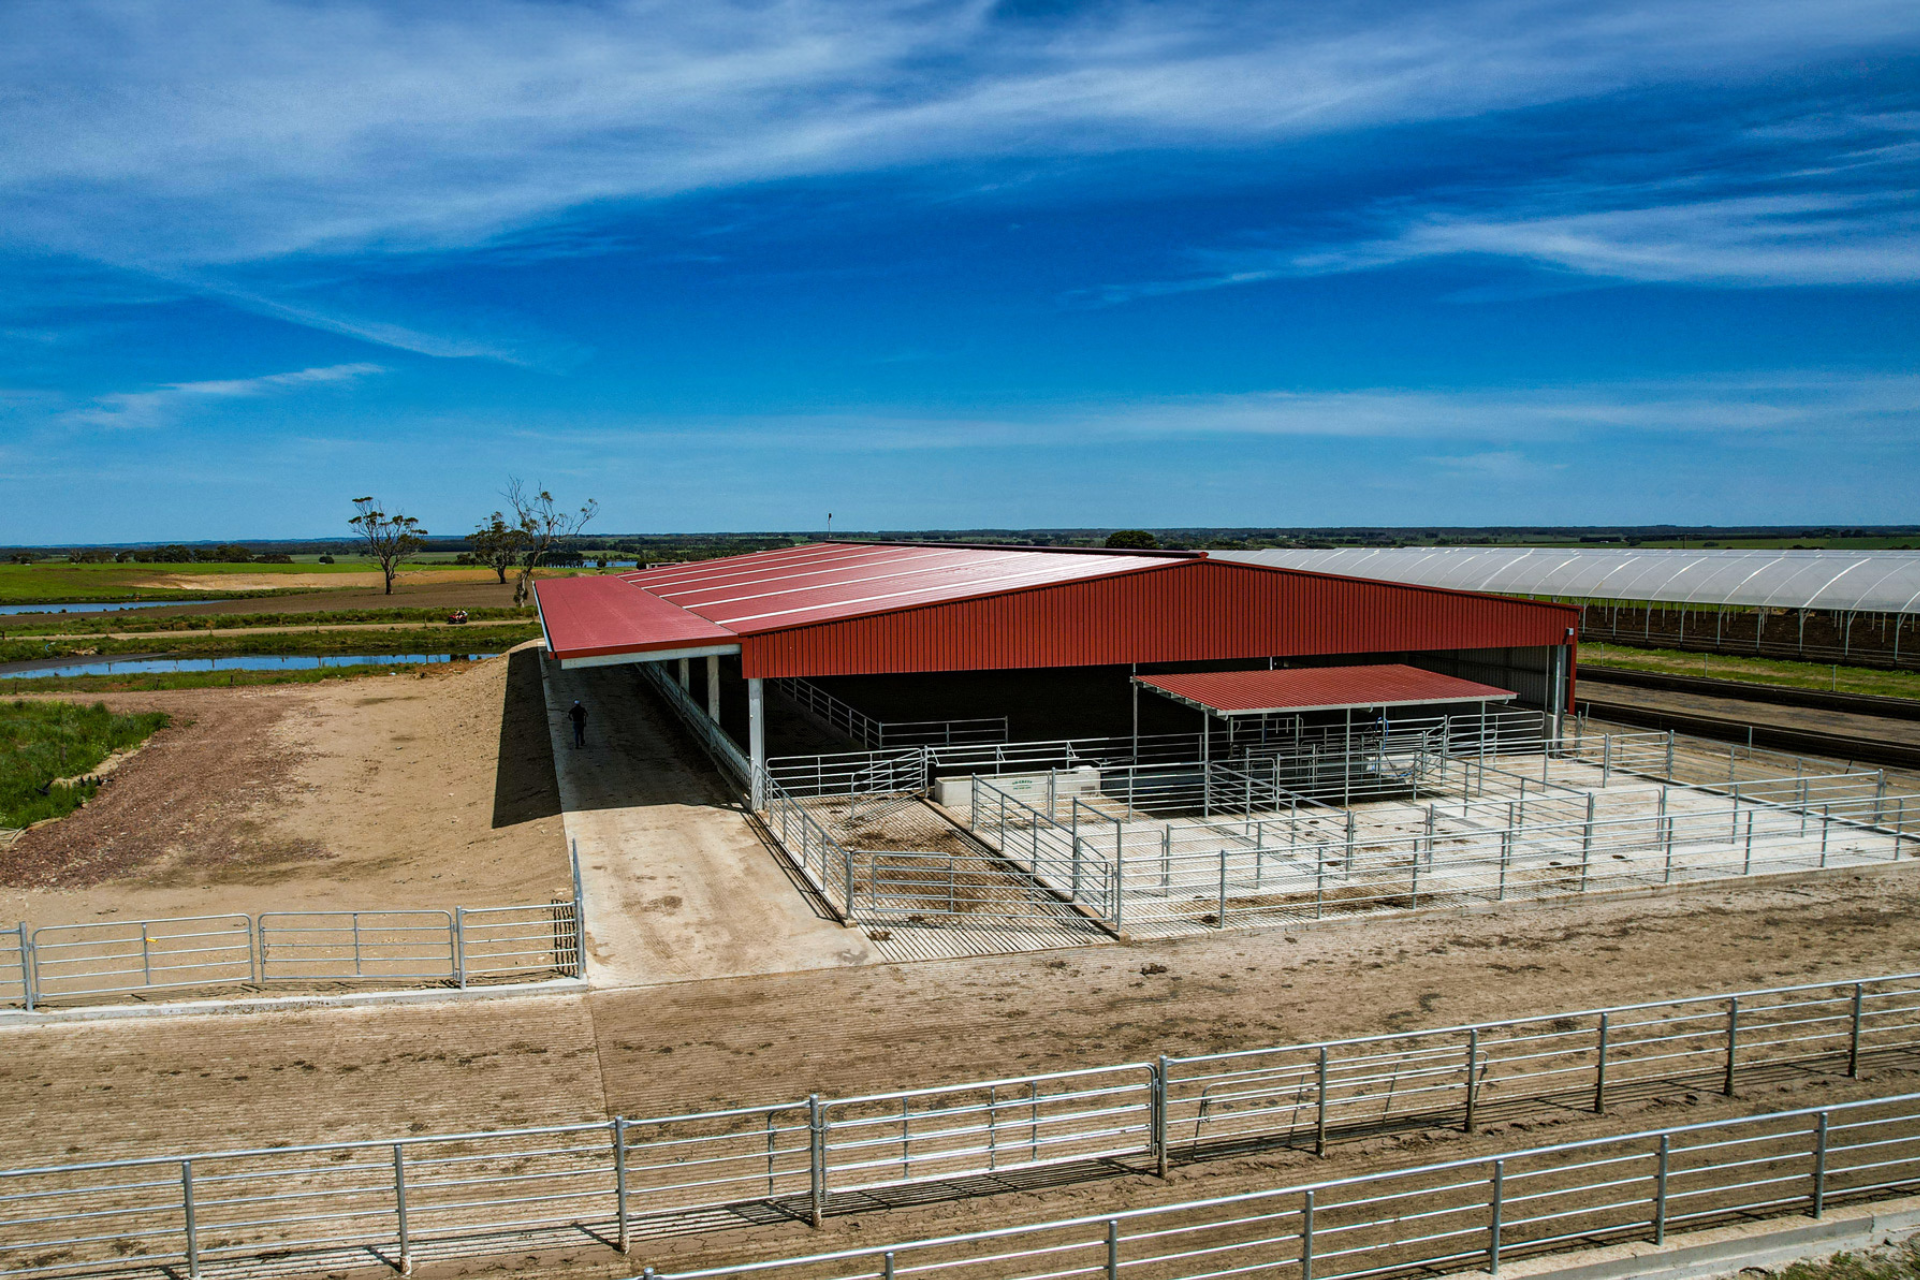
An excellent example of this design is the project completed at Bungador in 2021.
View the photos in the gallery below and learn more about the project here.
5
Protect Your Shed From Corrosion
Protecting your shed from rust and corrosion increases the longevity of your shed and reduces time and money spent on maintenance.
A calving shed is a very corrosive environment so a combination of concrete panels and Colorbond cladding is recommended.
For example, concrete panels protect cladding from both rust and machinery damage. This means the cladding does not have to be replaced within several years of the build.
And concrete panels make it easier to clean out your calving shed and replace the bedding.
Most importantly, a calving shed should be hot dip galvanized.
In fact, hot-dip galvanised UB columns and open web trusses are a standard inclusion on every Action shed. You can learn why in the video below.
What Is Hot Dip Galvanizing? How Does It Work?
6
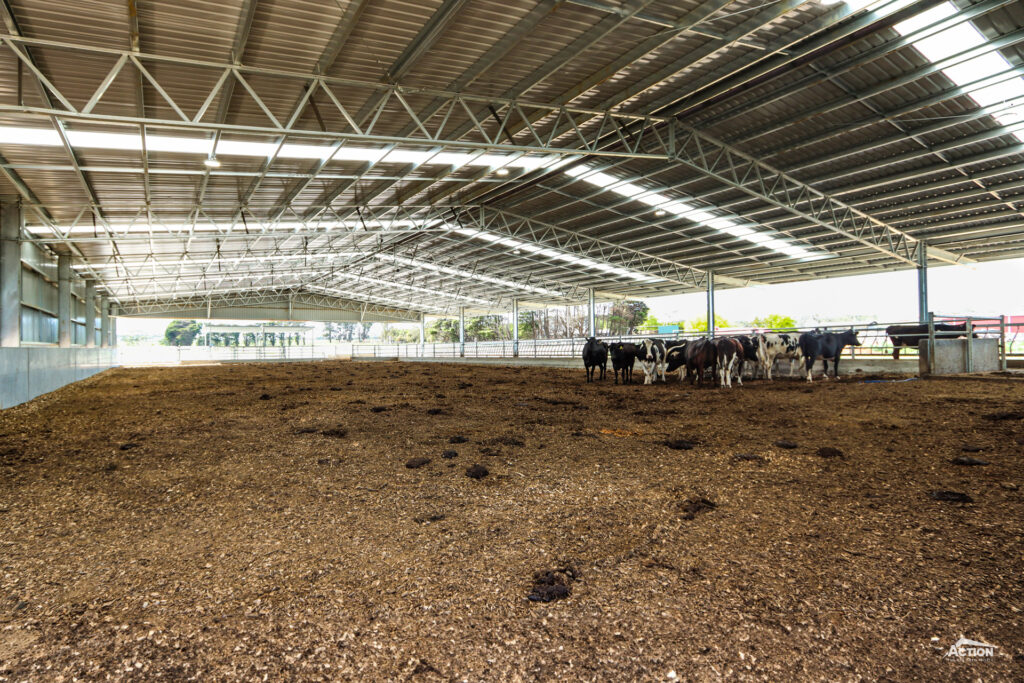
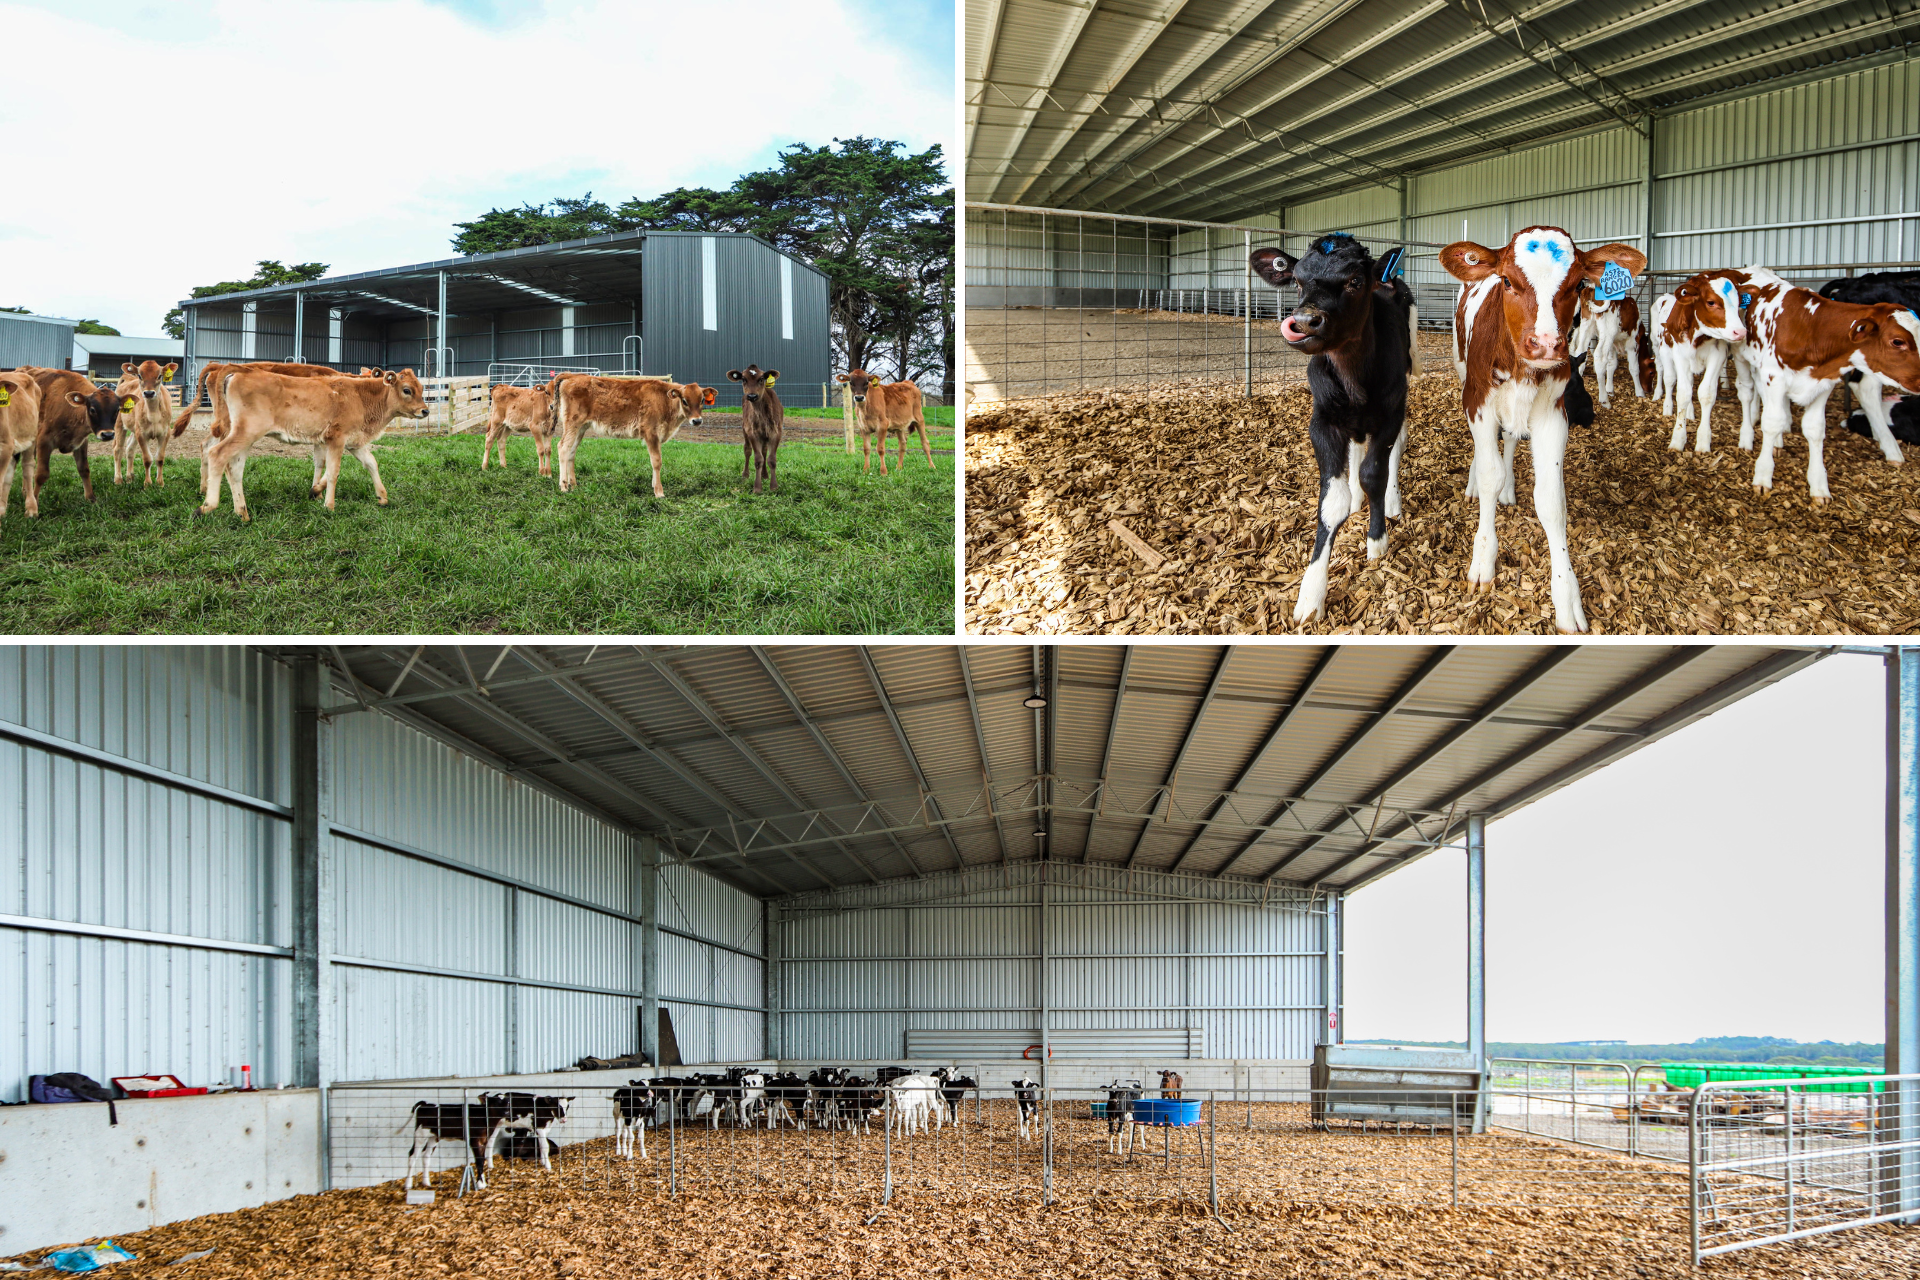
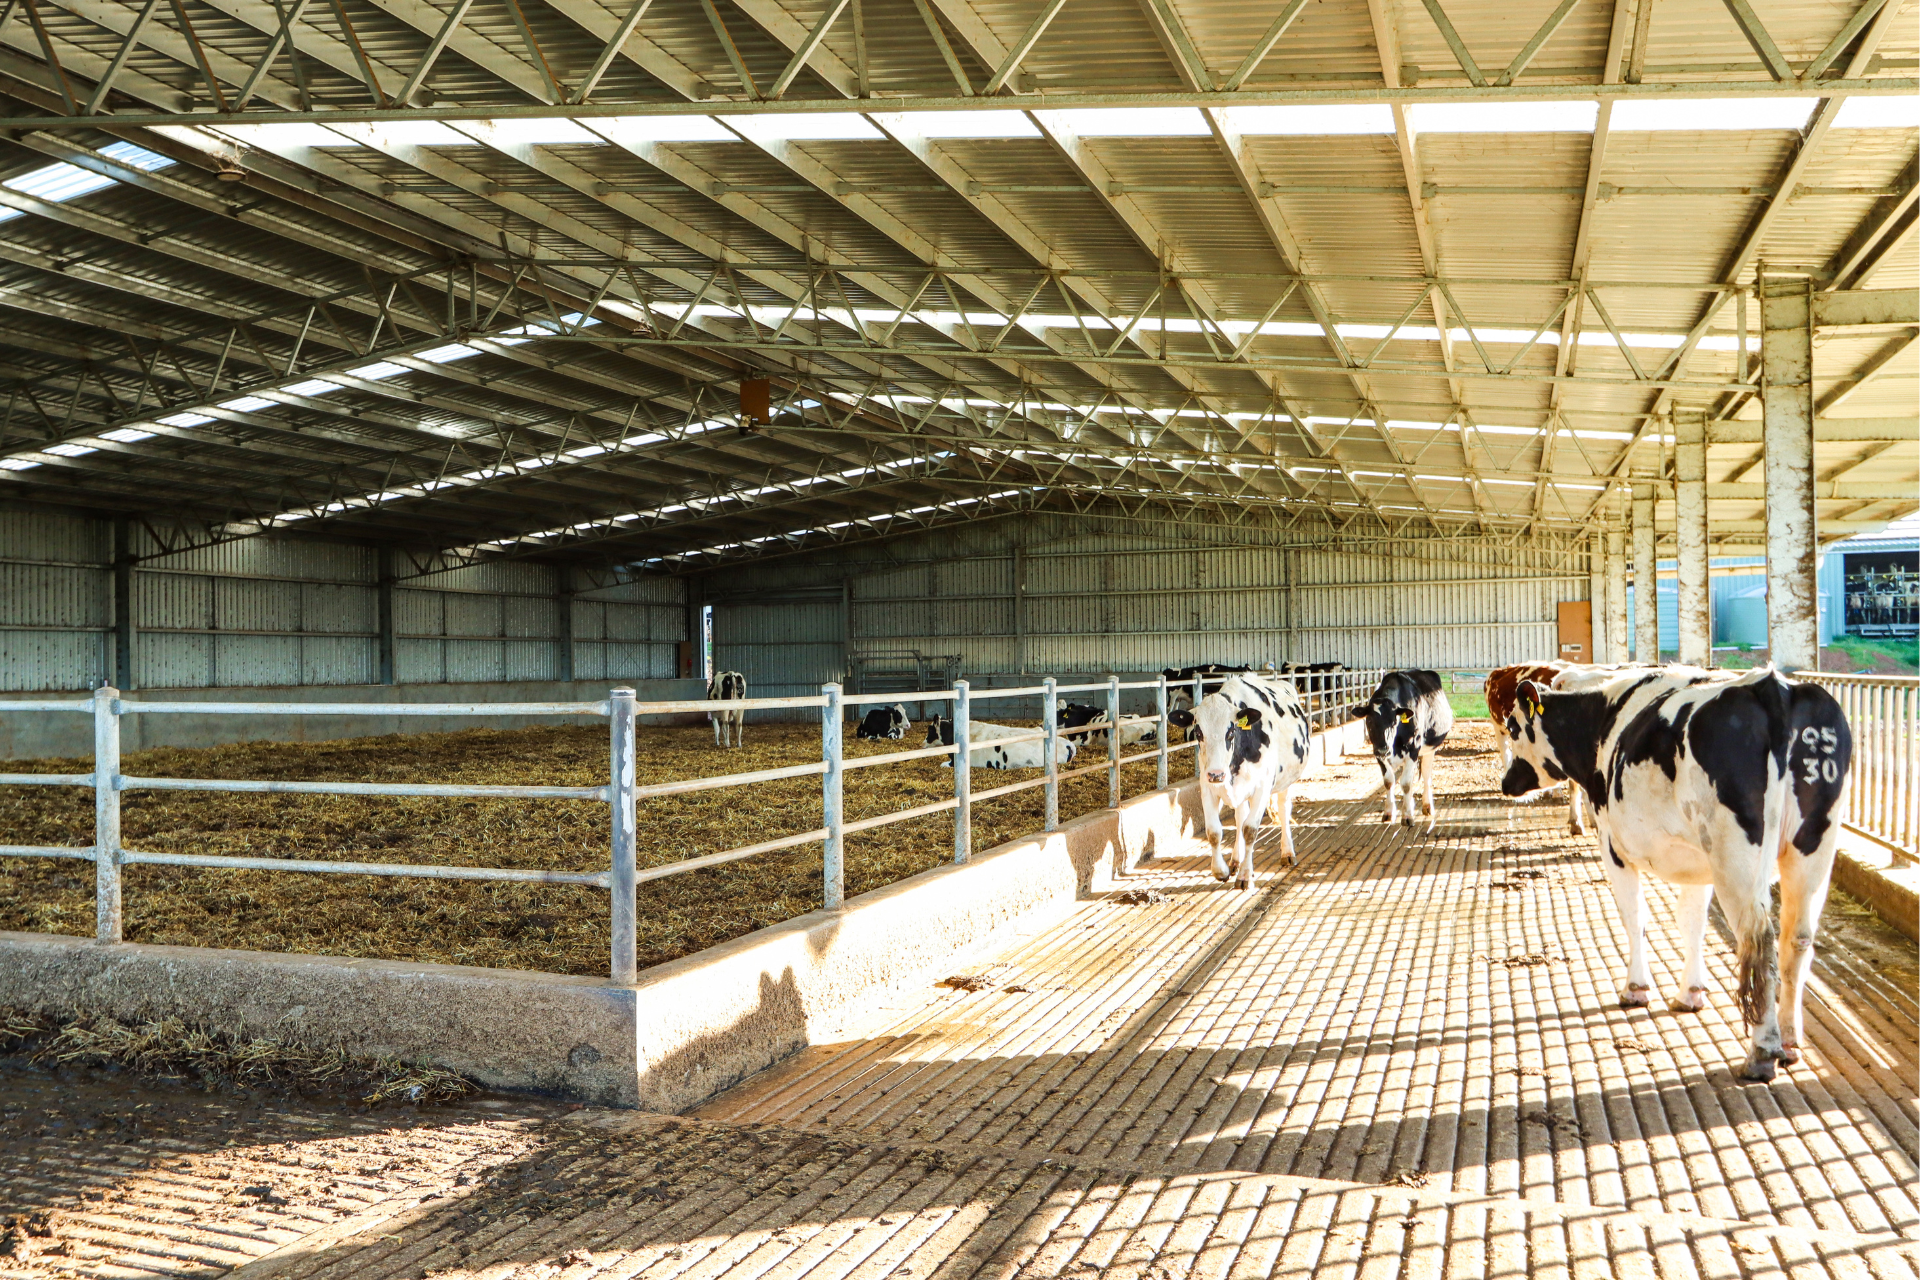
Choose The Right Bedding
Choosing the right bedding material for the flooring is an important step in creating a comfortable calving environment.
Straw is often the best option as it has excellent insulating properties. However, if straw is being used as a source of fibre you may want to consider alternatives such as wood chips or rice hulls.
Regardless of the bedding that you choose, it is important to practice good bedding management and having effective drainage.
7
Maintain Hygiene
A clean and well-maintained shed helps to prevent bacteria and diseases from spreading and makes your job easier too.
For example, a tidy set-up will ensure clean-up is a much more manageable when calving is finished.
There are several ways the shed design can make this task easier. These include:
- Planning and preparing your site
- Including a quarantine area
- Choosing quality materials such as concrete panels and hot-dip galvanized steel
These details all contribute to a low-maintenance design that makes following good hygiene practices easier.
Hot dip galvanized steel for example, not only prevents corrosion, but it also means that there is less chance of disease build-up, especially when compared to wooden materials.
8
Ensure The Ventilation Is Effective
Effective ventilation is essential for calving sheds to keep the air fresh and the cows comfortable.
A well-designed project will help keep cows cool and reduce ammonia buildup.
There are several ways to stimulate airflow through a calving shed such as installing ridge ventilation, increasing the roof pitch and choosing the correct orientation.
It is best-practice to use a combination of these and the design should be shaped by project specific details such as local climate, the number of cows and the size of the shed.
Design features such as sliding doors are a practical option as they can be opened or closed depending on the airflow requirements.
9
Provide Weather Protection
One of the most important roles that a calving shed plays is the protection from the prevailing weather.
There are several ways to ensure that this is done effectively.
The first step is to choose the correct orientation for the shelter, taking into account the direction of the incoming weather.
As well as providing access, sliding doors can be opened or closed to provide airflow or weather protection.
If you opt for a two-sided configuration, then partially clad walls and gable infills can be installed to provide additional shelter from the prevailing weather, without completely blocking the airflow.
A canopy on the open side of the shelter is an effective and cost-efficient way to provide additional weather protection without fully enclosing the shed.
So, that’s nine points to consider when preparing your calving shed!
Listed below are some additional articles and resources that you might find helpful:
- How Much Does It Cost To Build A Calving Shed?
- Concrete Panels For Calf Sheds – Are They Necessary?
- Calf Shed & Calving Shed Guide (PDF Download)
- What Is The Best Orientation For A Loafing Barn?
- What Is The Lead Time For A New Shed?
For more resources and information check out the Learning Hub.
To receive an obligation-free quote for a new calving shed build simply submit a REQUEST A QUOTE form or call us on 1800 687 888.

